> San Antonio Local Insight: Fixture and faucet leaks in San Antonio happen faster because hard water minerals (21 gpg from Edwards Aquifer) grind down valve seats, corrode cartridges, and prevent proper sealing. A faucet that lasts 15 years in soft-water cities often starts leaking within 5–8 years in San Antonio without a water softener.
Local San Antonio Field Notes Before You Start
Before following any generic plumbing checklist, adjust it for our Edwards Aquifer water. At roughly 357 mg/L, or 21 grains per gallon, the calcium carbonate and magnesium in the water can turn a small maintenance issue into repeat wear on valves, seals, drains, heaters, and appliance connections. That means small rubber seals, cartridges, fill valves, and supply stops deserve extra attention because mineral grit wears those parts faster here.
A homeowner in Helotes should be especially careful because well-water and edge-of-system supply can make mineral scale show up even faster. If you are comparing advice from national repair guides, shorten the maintenance interval and inspect for white scale, crusted fittings, stiff shutoff valves, and early corrosion before assuming the part simply “got old.”
For budgeting, use local pricing instead of national averages: fixture labor commonly runs $150-$300 for simple faucet or supply work, while toilet replacement often lands around $300-$800 including the unit. If the issue appears after a summer high-use period or after a rare freeze like Winter Storm Uri, treat it as a local risk signal and document what you see before calling a licensed plumber in Bexar County.
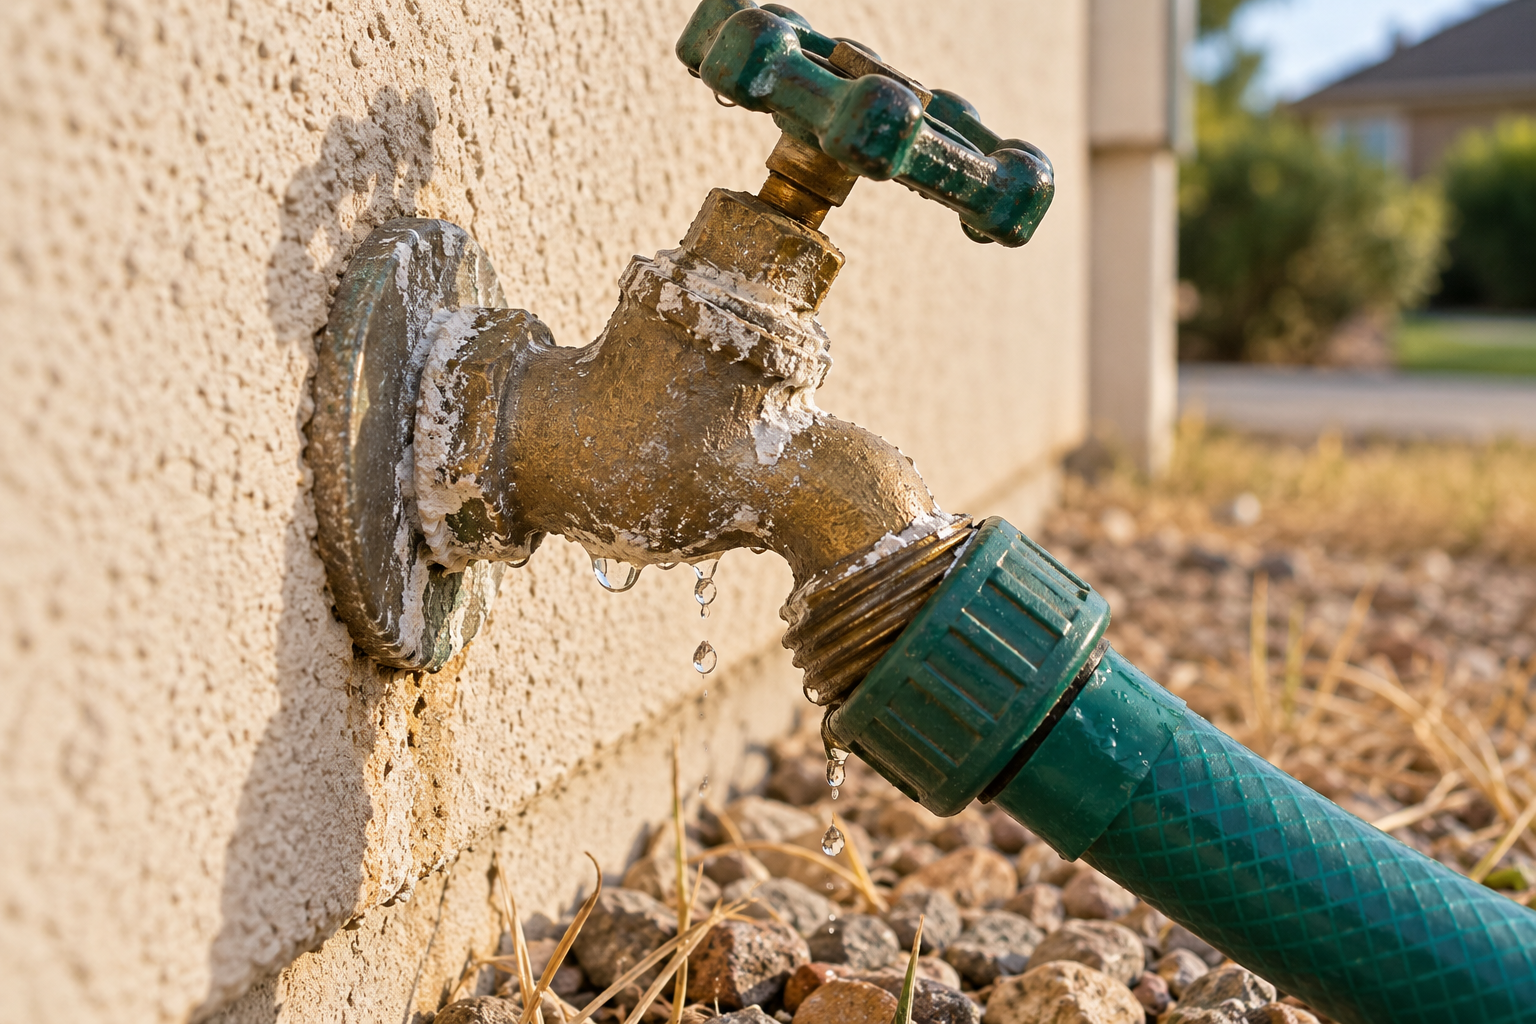
An outside water faucet leaking from the spout usually has a worn washer, damaged valve seat, or frost-free stem that no longer seals. Water around the handle often points to loose packing or a failed packing washer. Leakage behind the siding is more serious because it may come from a split pipe or frost-damaged faucet body inside the wall.
Start by removing the hose and identifying exactly where water appears. Close the faucet gently; forcing the handle can damage the stem. If water is spraying, entering the wall, or continuing at a significant rate, close the interior branch shutoff or the home's main water valve. Do not postpone a concealed leak: it can wet framing and insulation without leaving an obvious puddle outdoors.
Identify where the faucet is leaking
Dry the faucet and nearby wall, then observe it from several angles. A drip directly from the outlet while the handle is fully closed indicates the valve is not sealing. Water that wells up around the handle suggests packing trouble. Leakage at the hose connection may be as simple as a missing hose washer, while water emerging behind the flange or indoors calls for immediate shutdown and professional assessment.
Note whether the leak occurs continuously, only while the faucet is open, or only when a hose nozzle closes and creates backpressure. A faucet that appears fine until it is running may have a split body inside the wall—a common frost-damage pattern. Also check the interior side of the wall, basement rim joist, or crawlspace where accessible. Staining, damp insulation, soft drywall, or a musty odor can reveal concealed leakage.
| Leak location | Likely issue | Sensible first action |
|---|---|---|
| Spout when closed | Worn washer, stem, or seat | Isolate water and inspect service parts |
| Around handle | Loose packing nut or failed packing | Try a slight adjustment with water controlled |
| Hose connection | Missing or damaged hose washer | Replace washer; inspect threads |
| Anti-siphon cap | Worn vacuum-breaker parts | Replace approved service kit |
| Behind wall/flange | Split body, pipe, or connection | Shut off supply and call a plumber |
Safety first: isolate water before disassembly
Locate the interior shutoff serving the faucet, often in a basement, crawlspace, utility area, or cabinet on the opposite side of the wall. Close it, then open the outdoor faucet to release trapped pressure. If no branch valve exists or it will not close, use the main house shutoff. Never rely on the faucet handle itself as isolation while removing the stem.
Keep water away from exterior outlets, lighting, extension cords, and powered tools. If leakage has entered a wall containing electrical equipment, avoid the wet area and call an electrician where appropriate. Stop if you smell gas, encounter unknown piping, or find contaminated water. Outdoor supply water is generally clean at release, but it can collect soil, chemicals, or animal waste after reaching the ground or a cavity, so use gloves and wash afterward.
Common causes from simple to serious
The simplest cause is a hose connection rather than the faucet. A flattened rubber washer, cross-threaded coupling, cracked hose end, or debris on the sealing surface can spray water whenever the tap is open. Replace the washer and reconnect by hand before using modest tool pressure. Thread tape generally does not solve a garden-hose connection because the washer—not the threads—makes the seal; learn more in this guide to whether plumbing tape stops leaks.
Inside a conventional compression hose bib, a rubber washer presses against a valve seat. Age, grit, excessive tightening, or a rough seat can prevent closure. Around the handle, packing material seals the rotating stem. Frost-free sillcocks add a long stem and place the valve farther inside the heated building, but they can still freeze if installed without drainage slope or if a hose traps water. A split frost-free body often leaks indoors only while running.
Step-by-step homeowner inspection
First, remove every hose, splitter, timer, and nozzle. Clean the outlet and install a sound hose washer only if testing a connection. Next, close the faucet normally and watch the spout. Then open it briefly while someone observes the interior pipe from a safe, accessible location. If water appears inside, stop the test immediately, close the supply, and arrange repair.
With the branch supply isolated and pressure relieved, inspect the handle screw, packing nut, anti-siphon cap, flange, and visible pipe. Do not remove a vacuum breaker if local code requires it; use the correct approved replacement parts. Check the water meter after all fixtures are off if you suspect another leak, but remember irrigation, ice makers, water treatment, and automatic appliances can also use water.
Keep notes about when the leak occurs and take clear photographs. Model markings and dimensions help identify parts. Do not cut siding or open a wall casually: pipes, wiring, and weather barriers may be directly behind it. A plumber can often diagnose the assembly from the interior and exterior evidence before creating access.
Tools and materials for a low-risk repair
Useful items include an adjustable wrench, screwdriver set, flashlight, penetrating oil suitable for the application, replacement washers, and a bucket. Use two wrenches when appropriate—one to turn the service part and one to counterhold the faucet body—so torque is not transferred into piping inside the wall. A hose bib repair kit can be convenient, but parts must match the stem and faucet.
For hose leaks, keep garden hose washers on hand. For frost-free units, manufacturer-specific stem or vacuum-breaker kits are more reliable than universal guesses. Do not use epoxy, caulk, or sealant to conceal a structural split, and do not apply thread-seal tape to straight hose threads as a substitute for a washer.
Fixing a leak around the handle
If water appears around the stem only when the faucet is open, a loose packing nut may be responsible. After isolating the water, hold the faucet body steady and tighten the packing nut only slightly—often a small fraction of a turn. Restore pressure and test. Overtightening can make the handle difficult to operate, damage packing, or stress the assembly.
If adjustment does not work, the packing washer or packing material may need replacement. Remove the handle and packing nut only with the water off and pressure relieved. Arrange components in order and match replacements precisely. Stop if parts are heavily corroded, the body moves in the wall, or the pipe twists. Movement suggests inadequate support or a connection at risk of failing where you cannot see it.
Fixing a faucet that drips from the spout
A conventional hose bib often requires a new bibb washer at the end of the stem. Isolate water, open the faucet to relieve pressure, remove the handle and packing nut, and withdraw the stem without forcing it. Replace the washer with the same size and screw type. Inspect the stem and seat for scoring or mineral buildup, then reassemble without excessive force.
A damaged seat may need a compatible seat wrench and replacement, but not every model has a removable seat. Grinding or aggressively reaming an unknown faucet can ruin it. Frost-free stems differ substantially in length and design; use the manufacturer's procedure and exact parts. If the body is cracked or the internal seat is damaged, replacement is generally more dependable than repeated washer changes.
Dealing with vacuum-breaker and hose-connection leaks
An anti-siphon vacuum breaker prevents contaminated water from being drawn back into potable piping. Leakage from its cap may result from debris, a worn gasket, a damaged float, freezing, or a downstream attachment that maintains pressure. Remove hoses and devices, cycle the faucet, and follow the manufacturer's cleaning or service instructions. Replace the approved kit if damaged; do not permanently bypass this safety device.
For a hose coupling leak, inspect both sealing faces and replace the rubber washer. Start threads by hand to avoid cross-threading. Tighten until snug, test, and add only slight tool pressure if needed. If the faucet's outlet threads are crushed or cracked, replacement may be required. A heavy hose splitter can also strain the faucet; support hoses and avoid leaving bulky accessories attached through freezing weather.
When the leak is inside the wall
Water behind the flange, dripping indoors when the faucet runs, or dampness along the sill is not a washer-only problem. Shut off the branch and leave the faucet open to drain. A plumber may need to replace the sillcock, damaged fitting, or adjacent pipe. This is a form of water pipe repair, and access must preserve structural members, insulation, weatherproofing, and exterior cladding.
Frost-free faucets should generally slope slightly downward toward the exterior so the barrel drains after closure. They also need adequate support and a valve length suited to the wall. Replacement can involve soldered copper, threaded connections, or approved mechanical fittings. Because heat, concealed combustibles, code rules, and wall access complicate the job, this is often better left to a licensed plumber.
Cost and time expectations
Replacing a washer or hose gasket is inexpensive and may take less than an hour when parts release normally. A packing repair or manufacturer-specific stem replacement costs more but remains a modest project if the faucet is accessible. Corrosion, seized fasteners, discontinued parts, and lack of an interior shutoff can turn a simple attempt into a full replacement.
Professional cost depends on access, urgency, wall construction, and pipe material; a straightforward hose-bib visit here often starts around $150–$300, while concealed wall damage can push the total above $500. An exposed basement connection is generally easier than a finished wall behind cabinetry or masonry. Ask whether the estimate includes a new shutoff, backflow protection, wall access, exterior sealing, testing, and finish restoration. Compare the cost of repeated service parts with a complete frost-free replacement where winters are severe.
Prevent future outdoor faucet leaks
Disconnect hoses before freezing weather, even from a frost-free sillcock. Close and drain dedicated seasonal shutoffs if the system was designed for that procedure, and leave the exterior faucet in the position recommended for the installation. Insulated covers can reduce exposure but cannot compensate for a trapped hose, unheated interior cavity, or incorrectly sloped faucet.
Inspect the flange seal, handle, vacuum breaker, and indoor connection each spring. Avoid hanging heavy manifolds from the outlet and do not wrench the handle closed to stop a drip; that accelerates washer damage. If household pressure is unusually high or several fixtures fail, have the pressure regulator evaluated. Early attention to a small pipe leak repair can prevent concealed wall damage.
When to stop DIY and call a plumber
Call promptly if water enters the wall, the faucet body rotates, the pipe is cracked, the shutoff fails, or corrosion extends beyond a replaceable part. Professional help is also sensible when the assembly is soldered, access requires cutting finishes, code requires a backflow device, or freezing has likely damaged hidden piping. Never heat a frozen faucet with a torch or open flame.
Seek electrical help if water reaches outlets, fixtures, wiring, or a panel. If flooding is substantial, add a remediation professional to evaluate drying. A minor exterior drip can often wait for a normal appointment after isolation, but active concealed flow is urgent. Keep the branch off until the system is repaired and tested.
Frequently asked questions
Why does my outside faucet leak only when it is turned on?
Likely causes include packing leakage, a loose connection, vacuum-breaker trouble, or a split frost-free body inside the wall. Observe the indoor side while testing briefly; shut down immediately if water appears in the building.
Can I replace an outdoor faucet washer myself?
Often, yes, on a conventional accessible hose bib when you can isolate the water and identify the exact washer. Stop if the body turns, parts are seized, or the design is unfamiliar.
How urgent is a slow drip from the spout?
It wastes water and may worsen, but it is less urgent than water behind the wall. Isolate it if possible and schedule repair. In freezing weather, deal with it promptly because ice can create additional hazards and damage.
Should I leave a hose attached in winter?
No. A connected hose or closed accessory can trap water and defeat the drainage function of a frost-free faucet, increasing freeze risk.
Can I seal around the wall flange to stop the leak?
Exterior sealant can maintain the weather barrier, but it cannot repair leaking plumbing. Do not caulk over an active leak because that can redirect water into the wall and hide evidence.
Why This Is Different in San Antonio
San Antonio's Edwards Aquifer supplies some of the hardest municipal water in the United States: about 357 mg/L, or 21 grains per gallon. That limestone-filtered groundwater carries calcium carbonate and magnesium into our fixtures, valves, drains, heaters, and supply lines. For outside water faucet leaking, that matters because mineral deposits grind down seals, cartridges, fill valves, supply stops, spray arms, and small water passages faster than many generic guides assume.
- Scale buildup makes small restrictions worse, especially at cartridges, aerators, shutoff valves, drains, and heater connections.
- Fixtures, pipes, and appliances in our area can wear out 30-50% faster than in soft-water cities when maintenance is delayed.
- SAWS publishes annual water quality reports, but the practical homeowner takeaway is simple: maintenance intervals here should be shorter than national advice suggests.
Homes in Helotes are particularly affected because well-water and edge-of-metro systems can be even harder than SAWS city supply. Unlike cities with naturally soft water, local homeowners should treat hard-water maintenance as normal prevention, not an upsell.
> "When I see early leaks in San Antonio, I always look for hard-water scale, corrosion, and older neighborhood pipe materials before blaming one bad fixture." — Licensed local plumber
What San Antonio Homeowners Pay (2026)
| Service | Typical Cost in San Antonio |
|---|---|
| Faucet replacement labor | $150–$300 |
| Emergency plumber call | $150–$350; after hours $250–$500 |
| Plumber hourly rate | $85–$150/hr |
Prices are based on local metro area ranges for 2026. Costs may vary by neighborhood, access, pipe material, after-hours timing, and whether the plumber finds hard-water damage beyond the visible problem.
When to Call a San Antonio Plumber
Call a licensed local plumber if the problem involves active leaking, a shutoff valve that will not close, sewer smell, recurring clogs, water near electrical components, a water heater leak, or any pipe inside a wall, ceiling, or slab. Locally, expect many licensed plumbers to charge roughly $85-$150 per hour, with emergency visits commonly around $150-$350 and after-hours calls closer to $250-$500.
When you call, ask three local questions:
1. Are you licensed and insured for work in Bexar County or the surrounding local metro?
2. Have you dealt with Edwards Aquifer hard-water scale on this type of repair?
3. Should I also check the water heater, shutoff valves, or water softener while you are there?
Outdoor-faucet technicians here regularly find mineral-packed stems and freeze-split sillcocks, so a good pro should be able to explain whether the failure is normal wear, mineral damage, freeze damage from a cold snap like Winter Storm Uri, or a sign of a larger plumbing system problem.
San Antonio FAQ
Is local water hard?
Yes. San Antonio water is very hard at about 357 mg/L, or 21 grains per gallon, because much of it comes from the Edwards Aquifer and passes through limestone. That mineral content is why scale shows up quickly on faucets, showerheads, valves, drains, and water heaters.
Do local homes need a water softener?
A water softener is recommended for many local homes, especially if you see white scale, repeated faucet or valve problems, short water-heater life, or cloudy spots on dishes. A typical whole-home water softener installation in San Antonio runs about $1,500-$4,000.