> San Antonio Local Insight: San Antonio's extremely hard water from the Edwards Aquifer (357 mg/L, 21 gpg) shortens water heater lifespan by 2–4 years. Sediment buildup forces heating elements to overwork, causes popping/rumbling noises, and leads to premature tank failure. Local plumbers recommend flushing every 6 months — double the national frequency.
Local San Antonio Field Notes Before You Start
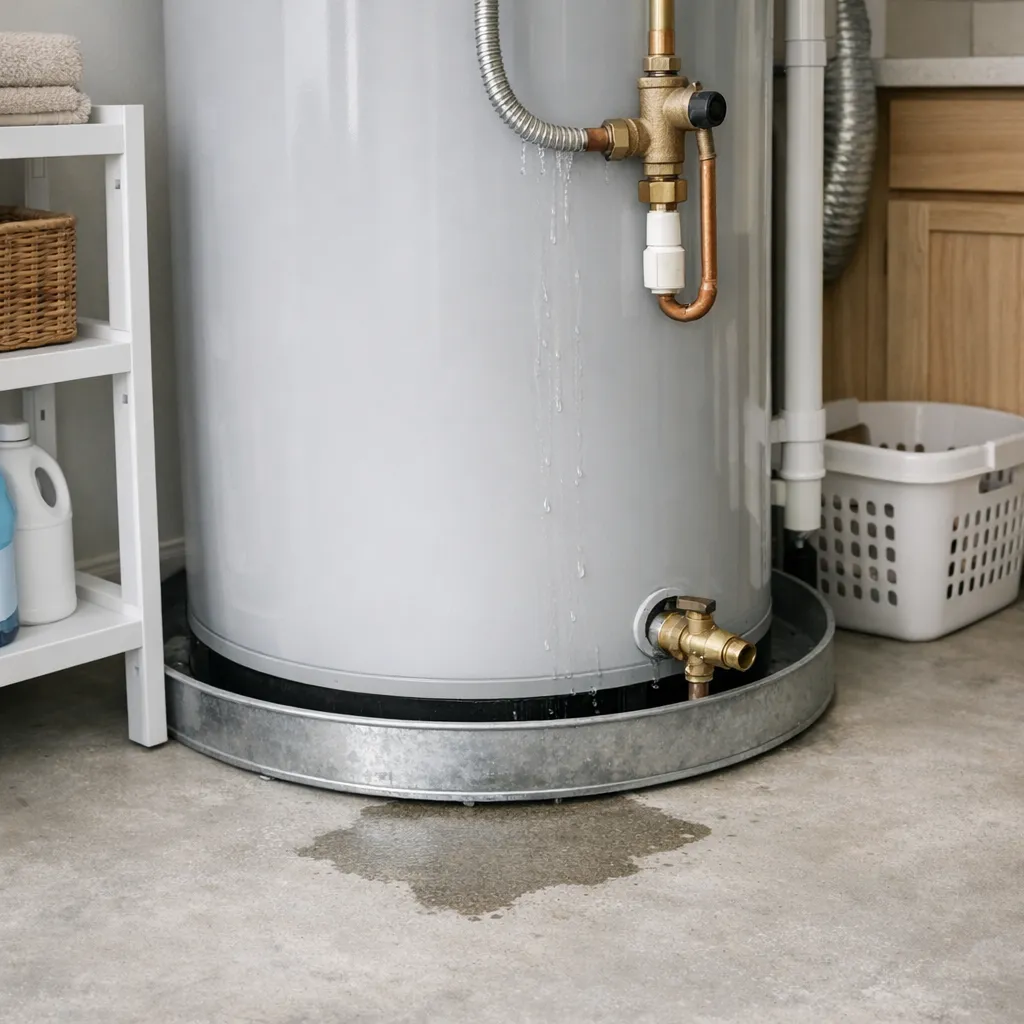
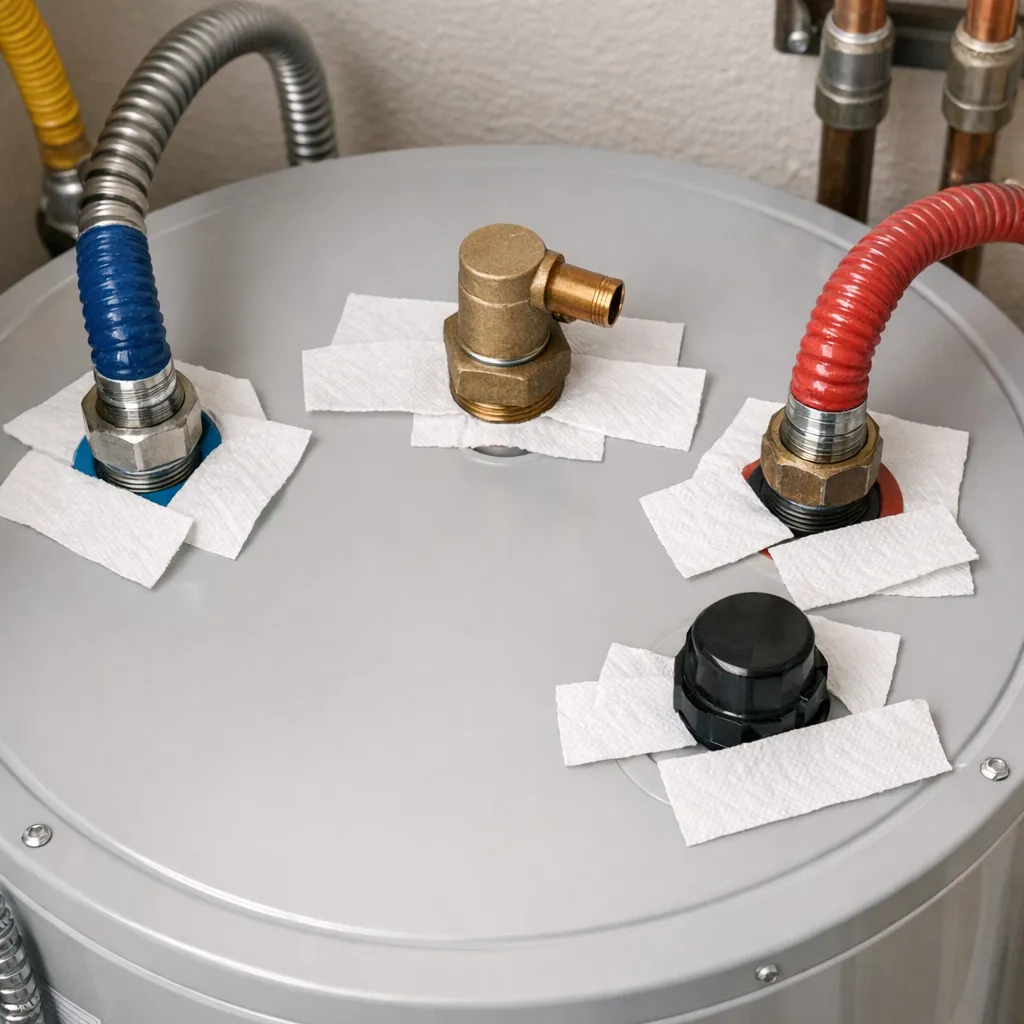
Water on top of a heater can come from a supply connector, nipple, shutoff, anode opening, or temperature-and-pressure relief piping; it does not automatically mean the tank shell failed. In older Alamo Heights homes, mixed metals and tight utility closets can make the source hard to see. Dry the top only if it is safe, place paper towels around each fitting, and watch which one wets first without touching gas or electrical components. Shut off the water if the leak is active. Connector or valve work may cost about $200–$550; corrosion emerging through the tank jacket usually points to a $1,200–$2,800 replacement rather than a patch.
Quick answer: what to do first
Look from a safe distance for the highest point that is wet. Common sources include the cold-water inlet, hot-water outlet, shutoff valve, flexible supply connectors, threaded nipples, an expansion-tank connection, or nearby plumbing above the unit. Dry surfaces can help reveal fresh water, but only work where there is no electrical, gas, or burn hazard.
If the leak is active, close the cold-water supply valve to the heater if the valve is reachable, dry, and working normally. Then stop the heat source: switch off the dedicated breaker for an electric heater, or follow the manufacturer’s shutdown directions for a gas model without disturbing gas piping. Open a hot faucet briefly only if appropriate and safe to relieve pressure; remember that discharged water may be scalding.
Why water at the top needs prompt attention
A small leak can travel. Water follows pipes, seams, insulation, and the curved tank surface before it reaches the floor. What appears to be a bottom leak may have started at the top hours earlier. Moisture inside the jacket can corrode the steel tank, damage controls, saturate insulation, and make the original source difficult to identify.
The location of the heater changes the urgency. A unit in a garage with a sound drain pan presents a different property-risk profile from one in an attic or finished closet. If water can affect ceilings, flooring, cabinets, or electrical equipment, shut down the supply and arrange professional help promptly rather than waiting to see whether the drip stops.
Common sources at the top of the heater
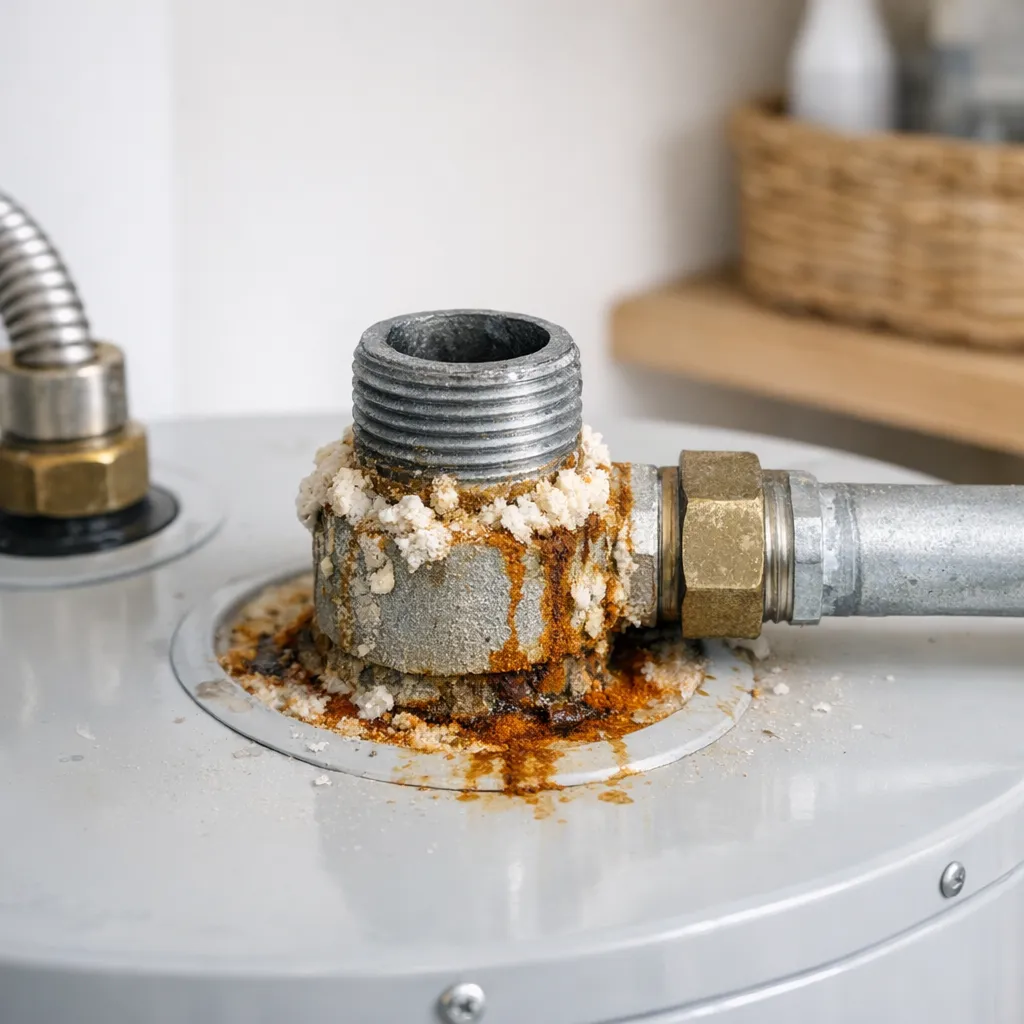
The cold inlet and hot outlet are frequent suspects. Threaded joints can seep as sealant ages, connectors can develop pinholes, and rigid piping can place stress on fittings. Mineral deposits, green or white crust, rust tracks, or a wet ring around a joint often indicate where leakage has persisted. Do not assume that tightening is harmless; excessive force can crack a fitting or damage the tank connection.
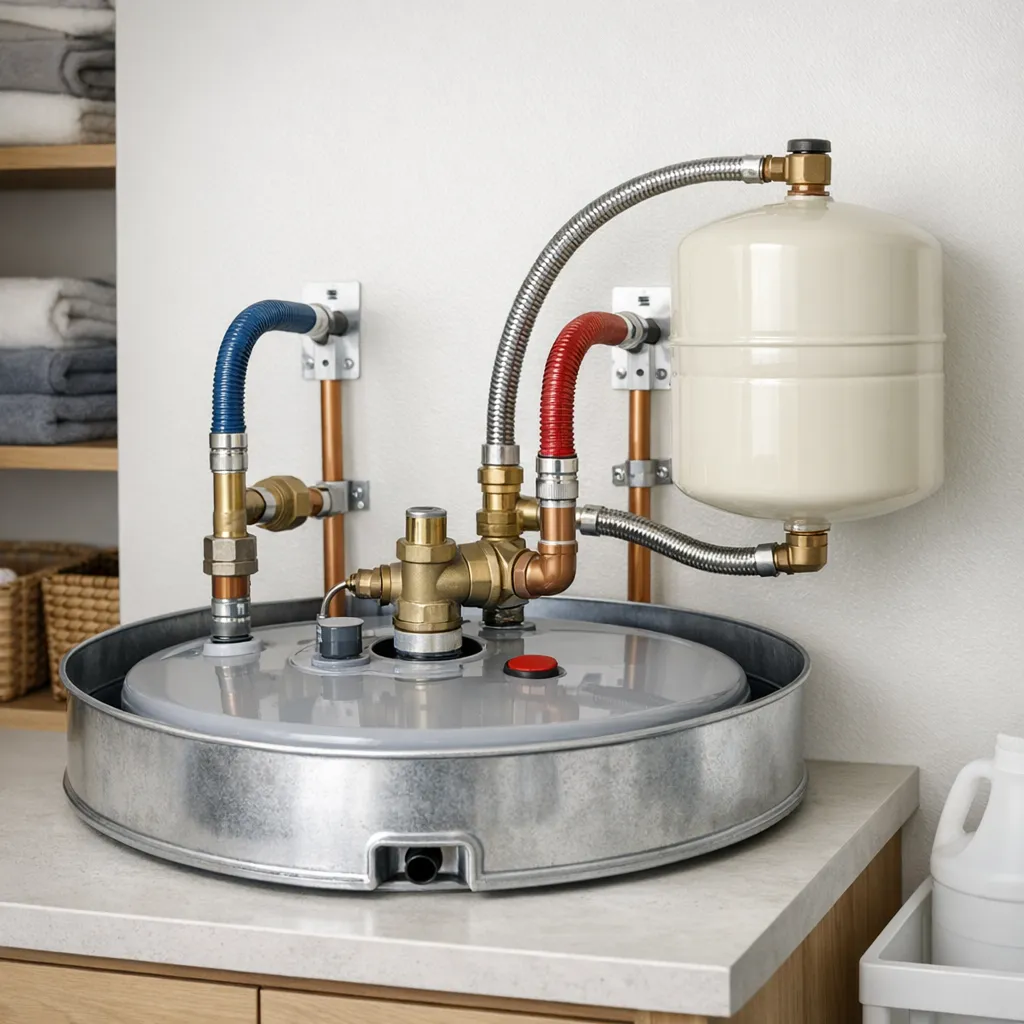
A shutoff valve above the heater may leak around its stem, body, soldered joint, or threaded connection. Water can then run down the inlet pipe and collect on the heater. An expansion tank, where installed, adds its own threaded joint and support requirements. Plumbing from an air conditioner, humidifier, or another fixture above the heater can also create a misleading puddle.
| Highest wet point | Likely source | Appropriate response |
|---|---|---|
| Valve stem or valve body | Worn or failed shutoff valve | Close upstream supply if needed; have valve repaired |
| Flexible connector | Washer, crimp, corrosion, or pinhole failure | Replace with an approved correctly sized connector |
| Threaded nipple | Failed seal, corrosion, or damaged threads | Professional disassembly and inspection |
| Expansion-tank tee | Loose joint, failed support, or tank issue | Isolate safely and have assembly checked |
| Tank jacket around a fitting | Fitting leak or corrosion at tank tapping | Shut down and obtain a tank assessment |
| No wet fitting, but water under top cover | Internal tank or hidden connection failure | Stop operation and call a professional |
How to trace the leak safely
Use a flashlight and inspect without removing covers. Photograph the full installation before touching anything. If the area is safe, place dry paper towels around separate joints; the first towel to become wet can identify the source. Check plumbing above and behind the heater so condensation or an unrelated pipe leak is not blamed on the appliance.
Observe whether leaking occurs continuously, only while water is heating, or after heavy hot-water use. A leak that appears as the system heats may relate to thermal expansion or pressure, while a constant seep is more consistent with a supply-side joint. This timing is evidence, not a complete diagnosis. Avoid operating a known-leaking heater merely to reproduce the symptom.
Shutoff and energy safety
For an electric heater, water near the upper access panel, junction box, wiring, or disconnect can create shock and fire hazards. Use the circuit breaker only if you can reach it without crossing water or touching wet equipment. Do not remove an access panel, test voltage, or reset a breaker that trips again unless you are qualified for line-voltage work.
For a gas heater, do not loosen the gas connector, alter the valve, relight a unit in a wet or abnormal condition, or obstruct combustion air. A water leak and a gas leak are separate hazards. If gas odor is present, leave without operating lights, switches, or phones inside. Follow the gas utility’s emergency instructions.
Hot water creates another risk. Pipes and discharged water can cause serious burns. Do not disconnect a connector or open a drain valve on a hot, pressurized tank. A technician may need to let the water cool, isolate the unit, relieve pressure, and drain enough water before repairing top connections.
Which top leaks are often repairable?
A failed connector, valve, or accessible plumbing joint may be repairable when the tank tapping is sound. The correct fix usually means replacing a worn component or remaking the joint with compatible materials—not smearing sealant over the outside. The repaired system should be refilled, purged of air, checked under pressure, and reinspected during a heating cycle.
Corrosion changes the picture. If removing a fitting could tear a weakened tank nipple or if rust extends into the tank opening, a seemingly minor repair may not be reliable. Galvanic corrosion can occur where dissimilar metals meet without an appropriate transition. A plumber should evaluate the connection, tank condition, local code, and manufacturer requirements before selecting replacement materials.
When the tank itself may be failing
Water emerging from beneath a top cover, through the jacket, or around a badly corroded tank tapping can indicate internal failure. Because insulation can hold and redirect water, the visible outlet is not necessarily the original breach. Extensive rust, repeated leaks, or water returning after external fittings are confirmed dry strengthens the case for replacement.
A storage tank is a pressurized vessel and should not be patched, welded, or coated as a household repair. If the tank has failed, shut off its water and energy supplies and arrange replacement. Collecting the drip while continuing normal operation can allow hidden damage to spread and may expose occupants to electrical, gas, or scalding hazards.
DIY boundaries and professional repairs
Homeowners can document symptoms, clear access, identify the model, and perform a visual inspection. Beyond that, the necessary work may involve line voltage, gas combustion, scalding water, pressure, heavy equipment, and code requirements. Replacing top fittings can be deceptively difficult because corrosion may cause parts to break during removal.
Call a licensed plumber when the leak cannot be isolated, the shutoff valve fails, corrosion is significant, rigid piping is strained, or water has entered the jacket. Electricians may be needed for damaged circuits, and qualified gas technicians should address gas-control or venting concerns. If the heater is in an attic or above finished rooms, quicker professional intervention helps limit property damage.
Repair or replace the water heater?
Base the decision on tank age, warranty, corrosion, repair history, efficiency, capacity, and the exact failed part. A relatively new tank with a leaking replaceable connector is generally a sensible repair candidate. An older tank with corroded tappings, multiple prior repairs, rusty water, or evidence of internal leakage is a weaker candidate.
Ask for an itemized repair estimate and a complete replacement estimate. Replacement pricing should include permits where required, disposal, connectors, drain pan and drain routing, expansion control, shutoffs, venting, and electrical or gas updates. Comparing a complete repair with a bare equipment price gives a misleading result.
Preventing another top leak
Inspect the heater periodically without removing covers. Look for fresh mineral crust, corrosion, bulging connectors, dampness, unsupported piping, and water in the drain pan. Ensure stored items do not block access, combustion air, or controls. Deal with small plumbing leaks before they saturate insulation or damage the tank connection.
Excessive water pressure and uncontrolled thermal expansion can stress valves and joints. A plumber can measure pressure and determine whether a pressure-reducing valve or properly functioning expansion tank is needed. Follow the manufacturer’s maintenance instructions for flushing and anode inspection; recommendations vary by model and water conditions.
What to tell the plumber
Provide the model and serial number, approximate installation date, fuel type, leak timing, and photos showing the highest wet point. Mention whether the leak changes during heating or hot-water use and whether any breaker, error code, odor, unusual sound, or relief-valve discharge occurred. Accurate details help the technician bring likely parts without encouraging diagnosis by guesswork.
Ask the plumber to identify the source before approving repair and to explain whether corrosion extends into the tank. The written estimate should name parts, labor, warranty, and exclusions. After work, request confirmation that connections were checked under pressure and that electrical, combustion, venting, and relief safety were not compromised.
Frequently asked questions
Can I keep using a heater that drips only a little?
It is not a good idea. A slow leak can accelerate, enter electrical parts, corrode the tank, and damage surrounding materials. Isolate the heater and arrange diagnosis.
Should I tighten the leaking top connection?
Not blindly. Tightening the wrong joint or using too much force can twist piping, damage threads, or break a corroded tank fitting. A qualified plumber can isolate, disassemble, inspect, and reseal or replace it correctly.
Why does the leak appear only when the heater runs?
Heating expands water and can raise pressure in a closed plumbing system. A marginal joint may leak more under those conditions. Pressure and expansion control should be checked rather than simply resealing the visible joint.
Is water on top always a plumbing leak?
No. Condensation or plumbing above the unit may be responsible. Trace the highest fresh moisture and inspect nearby equipment, but do not delay shutdown if water is near electrical components.
Does a top leak mean I need a new heater?
Not always. External valves and connectors are often replaceable. Internal leakage, severe corrosion at tank tappings, or a failing older tank usually favors replacement.
Final homeowner checklist
Keep clear of wet electrical equipment and respond immediately to any gas odor. Shut off the cold-water supply and energy source only when controls are safely accessible. Photograph the installation, find the highest wet location without dismantling components, record the model and age, and call a qualified professional when the source or safe isolation is uncertain.
A hot water heater leaking from the top is often repairable when caught early, but the correct response depends on whether the water comes from external plumbing or the tank itself. Prompt shutdown, careful tracing, and an itemized professional diagnosis protect both the home and the people in it.
Why This Is Different in San Antonio
Edwards Aquifer water—about 357 mg/L, or 21 gpg—leaves scale on nipples, valves, and threaded connections at the top of a heater. That can make a fitting appear dry between heating cycles, then leak as pressure and temperature change. SAWS data explains the mineral source, while the actual diagnosis still requires tracing the highest wet point. In Bexar County homes, check whether the pan and drain can contain a worsening leak before leaving the unit in service.
What San Antonio Homeowners Pay (2026)
| Top-leak service | Typical 2026 range |
|---|---|
| Connector or shutoff replacement | $200–$450 |
| Nipple, anode, or valve work | $250–$650 |
| Tank replacement | $1,200–$2,800 |
| Emergency/after-hours premium | often $150–$350+ |
Corroded threads, restricted access, code upgrades, and water damage can add cost. The estimate should identify the proven source, not merely say “top leak.”
When to Call a San Antonio Plumber
Call promptly if water is entering an electrical compartment, the gas control is wet, the shutoff is seized, the relief valve is involved, or corrosion appears through the jacket. Homeowners may shut off water and energy when safe and observe fittings; do not tighten hot corroded fittings, cap a relief line, or energize a wet unit.
San Antonio FAQ
Can I keep using the heater if the top only drips?
A slow drip can worsen and damage controls or the tank jacket. Isolate the source and arrange repair rather than relying on a towel or pan.
Does water on top prove the tank is ruined?
No. Supply fittings are replaceable, but water emerging from beneath the jacket or a corroded tank opening may justify replacement.