> San Antonio Local Insight: Fixture and faucet leaks in San Antonio happen faster because hard water minerals (21 gpg from Edwards Aquifer) grind down valve seats, corrode cartridges, and prevent proper sealing. A faucet that lasts 15 years in soft-water cities often starts leaking within 5–8 years in San Antonio without a water softener.
Identify Where the Faucet Is Leaking
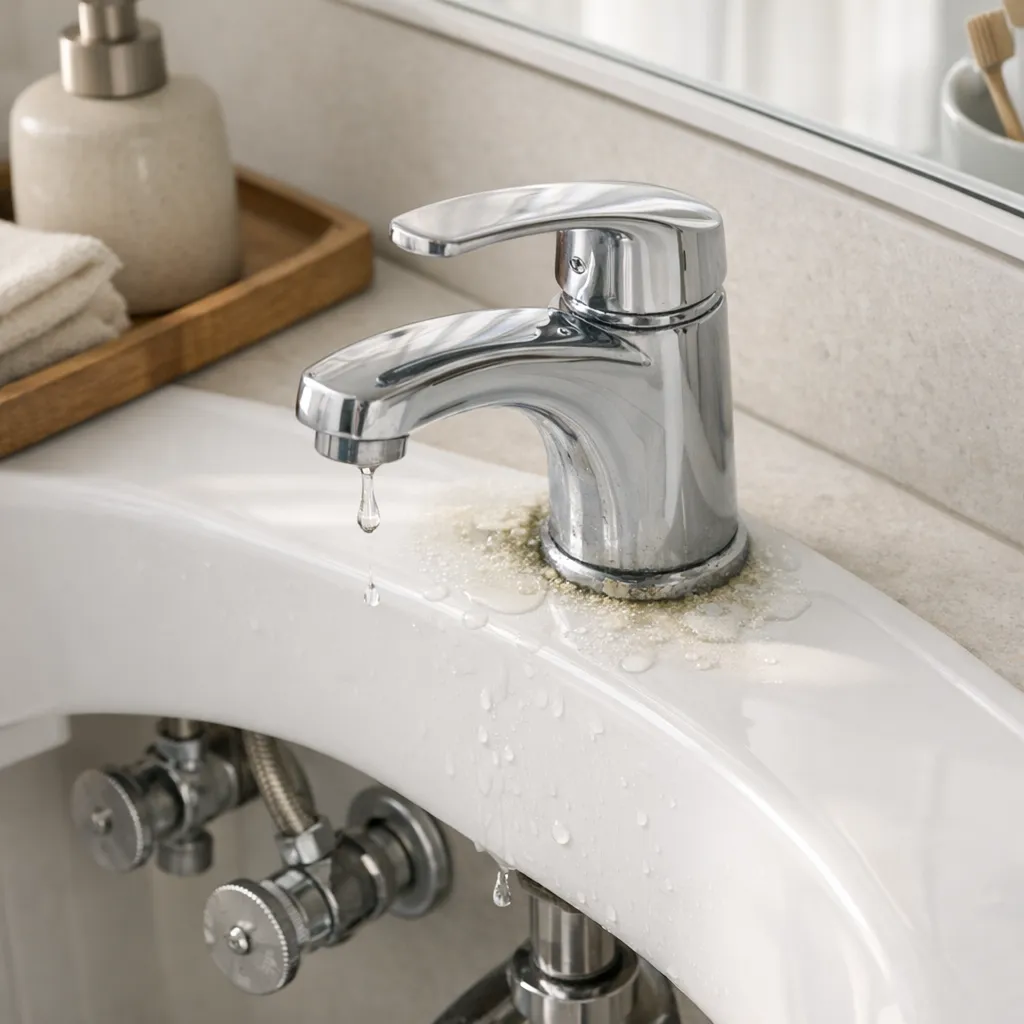
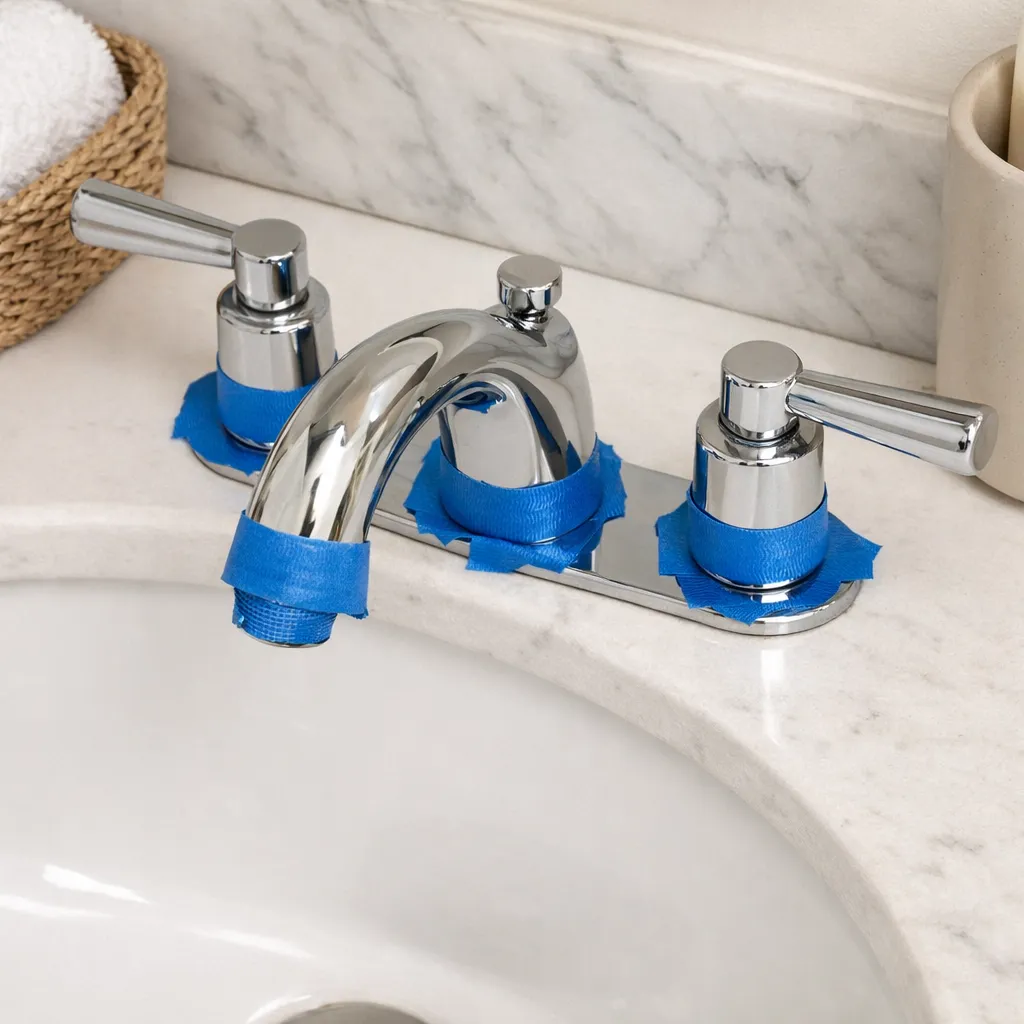
A drip from the spout usually points to a cartridge, washer, or valve seat; water around a handle suggests an O-ring or packing seal; moisture at the base may come from a body seal or water splashing past failed caulk. Dry everything and wrap a strip of tissue around each possible source before buying parts.
The Edwards Aquifer supplies water around 357 mg/L, or 21 gpg, and the mineral grit can make cartridges stiff and score sealing surfaces. In an Alamo Heights home with older galvanized or mixed-metal lines, turn a stop valve gently—forcing a scaled valve can create a larger leak. A cartridge often costs $20–$80; local faucet labor commonly runs $150–$300.
DIY is reasonable when the shutoffs work, the correct cartridge is available, and the leak remains above the vanity. Shut off both supplies and open the faucet to relieve pressure. Stop if the valve will not close, a connection twists inside the wall, or you find corrosion on the supply tube. Bexar County homes stressed during Winter Storm Uri may have damage beyond the visible fixture, so a new drip after a freeze event deserves a broader inspection.
Quick answer: isolate the source before buying parts
A drip from the spout when the handles are off usually points to an internal valve problem: a worn washer, cartridge, ceramic disc, O-ring, or valve seat. Water at a handle commonly indicates a failed O-ring or packing seal. Water around the faucet base may come from a deteriorated base gasket, loose mounting hardware, or water splashed onto the deck rather than an actual plumbing leak.
Do not assume every puddle beside the faucet originates inside it. A loose aerator can spray backward, water can run along the underside of a spout, and a failing supply connection may wet the cabinet below. Diagnose first, identify the faucet type, and take the old component to a plumbing supplier if its model number is unavailable. Matching the correct part is often the difference between a lasting repair and another leak.
Common leak locations and what they usually mean
Use the following quick reference after drying the fixture and surrounding area:
| Where water appears | Likely causes | First sensible check |
|---|---|---|
| Spout while faucet is off | Worn cartridge, washer, disc, or valve seat | Confirm which handle controls the drip |
| Around a handle | O-ring, packing, cartridge seal, loose retaining nut | Remove decorative cap and inspect safely |
| At the faucet base | Failed gasket, loose mount, splash water | Dry the deck and test one flow setting at a time |
| At the aerator | Loose aerator or damaged washer | Hand-tighten, then inspect the washer |
| Inside the vanity | Supply hose, shutoff, tailpiece, or drain leak | Use dry tissue to trace the first wet point |
A useful clue is timing. A spout that drips continuously with both handles off generally has a valve-sealing issue. Moisture that appears only while water is running may involve the aerator, spout joint, or a connection below. Water that appears only after the basin drains can be a drain leak rather than a faucet leak. Keep these systems separate in your diagnosis.
Safety first: shutoffs, electricity, and damaged materials
Locate the hot and cold shutoff valves beneath the sink before removing any faucet component. Turn them clockwise gently; do not force a corroded or frozen valve. Open the faucet afterward to relieve pressure and verify that flow has stopped. If a shutoff continues feeding water, leaks around its stem, or begins turning with the pipe, close the home’s main water valve and call a plumber. An old valve can fail when disturbed.
Keep water away from receptacles, power strips, illuminated mirrors, and vanity wiring. If water has reached electrical equipment, avoid touching wet surfaces and switch off the circuit only if the panel can be reached safely from a dry location. Extensive swelling, soft flooring, visible mold, or water entering a wall suggests a longer-running problem. Repairing the faucet alone will not address concealed moisture or damaged cabinetry.
Identify the faucet mechanism
Two-handle compression faucets often use rubber stem washers that press against valve seats. They are common candidates for washer replacement, although a rough or damaged valve seat can quickly ruin a new washer. Cartridge faucets use a removable cartridge to control flow. A two-handle cartridge design may require replacing only the hot or cold side; a single-handle model often uses one larger cartridge.
Ball faucets contain several small springs and seals beneath a rounded cap, while ceramic-disc faucets use durable ceramic plates housed in a cylinder. These systems require model-specific parts and assembly order. Look beneath the sink, behind a handle, or on the manufacturer’s documentation for a brand and model number. Photograph each stage during disassembly and arrange components in order so clips, washers, and spacers return to their original positions.
Step-by-step checks without unnecessary disassembly
First, clear the vanity, place a tray or towel below the plumbing, and dry every surface. Wrap small pieces of dry tissue around supply connections and shutoff stems. Run cold water, then hot water, watching for the first tissue that darkens. Fill the basin halfway and drain it if you also suspect a drain leak. This controlled sequence prevents water from one source from disguising another.
Next, inspect the aerator. Mineral buildup or a displaced washer can make water spray toward the faucet base. Unscrew it by hand when possible; if pliers are necessary, protect the finish with a cloth and use light pressure. Clean debris, reinstall the internal pieces in the same order, and hand-tighten. Also check whether ordinary handwashing splashes water through an unsealed gap behind the faucet.
Finally, with the supplies off, verify that handles and trim are secure but do not overtighten them. Excessive force can crack ceramic parts, distort seals, or damage plated finishes. If the leak comes from inside the valve, proceed only after identifying the exact mechanism and obtaining compatible replacement parts.
How to replace a washer, O-ring, or cartridge
Plug the drain so screws cannot fall into it. Remove the decorative handle cap, screw, and handle using the correct screwdriver or hex key. Take off trim pieces carefully, then remove the retaining nut or clip specified for that faucet. Hold the faucet body steady if loosening a nut could twist the assembly. Never pry aggressively against porcelain or stone.
For a compression stem, inspect the rubber washer at the bottom and replace it with an exact match; inspect the O-ring on the stem as well. For a cartridge, note its orientation before pulling it straight out. Mineral deposits may make removal difficult, so use the manufacturer’s recommended cartridge puller rather than rocking the valve body hard. Lubricate approved seals only with silicone plumber’s grease—petroleum products can damage some rubber compounds.
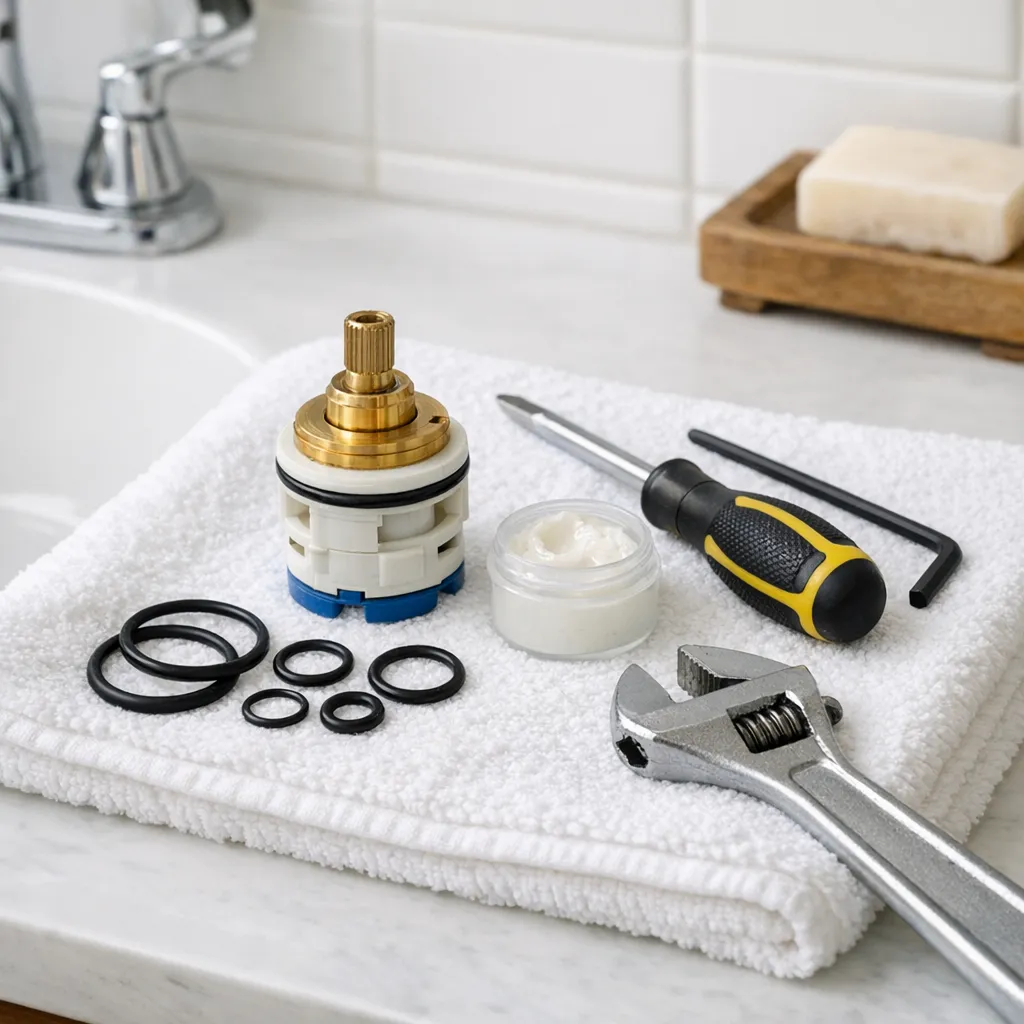
Reassemble in reverse order. Open each shutoff slowly while the faucet is in its open position, allowing trapped air to escape. Then close the faucet and inspect every repaired area. Run hot and cold water separately and together. Wipe connections dry and recheck after several minutes; a repair that looks dry during the first test can seep under sustained pressure.
Fixing leaks at the base or below the sink
If water emerges around the faucet base only while the faucet runs, rule out splash and aerator spray first. A genuinely failed base gasket may require removing the faucet. That means disconnecting supply lines, loosening mounting nuts in a cramped space, lifting the fixture, cleaning old residue, and installing the correct gasket or sealant according to the manufacturer. Plumber’s putty is not suitable for every stone, plastic, or gasketed installation.
Below the sink, a leaking braided supply hose should generally be replaced rather than patched. If a connection seeps, turn off water, release pressure, and inspect whether the hose washer, fitting, or threads are damaged. Compression fittings seal at the ferrule, not by wrapping thread tape indiscriminately around every thread. A leak at the drain tailpiece or P-trap is a separate drain-system repair; observe whether it occurs only when the basin empties.
Mistakes that turn a small drip into a larger repair
The most common mistake is replacing parts before locating the leak. Other avoidable errors include forcing seized shutoffs, using an incorrect cartridge, scratching a finished surface with bare pliers, overtightening plastic nuts, and losing a retaining clip down the drain. Universal-looking parts are not always interchangeable. Even cartridges from the same manufacturer can differ subtly in height, ports, or stem shape.
Another mistake is sealing around the visible faucet base while water is actually traveling from a valve or supply connection. Caulk may hide the symptom and trap moisture below. Likewise, chemical drain cleaner will not fix a faucet and can create a hazardous work area if plumbing later needs to be opened. Diagnose the pressurized faucet supply and the drain assembly as separate systems.
Repair, replace, or call a plumber?
Repair makes sense when the fixture is otherwise sound, shutoffs work, replacement components are available, and the leak clearly comes from a serviceable seal. Replacing the faucet may be more practical when its body is corroded, multiple components are failing, parts are obsolete, or the finish is badly deteriorated. Consider the condition of the supply hoses and shutoffs at the same time, but do not expand the job beyond your ability to control the water safely.
Call a licensed plumber when shutoff valves will not close, pipes move as fittings are turned, water is entering the wall or floor, the faucet body is cracked, or repeated cartridge replacement does not stop the leak. Professional help is also sensible for inaccessible wall-mounted faucets, widespread corrosion, recurring low pressure with dirty water, or evidence of substantial hidden damage. Urgent service is warranted for uncontrolled flow or water near live electrical equipment.
Preventing another bathroom faucet leak
Operate handles with moderate pressure; forcing them closed compresses and wears seals without improving performance. Clean the aerator periodically, especially where mineral deposits accumulate. Avoid abrasive cleaners that can damage finishes and seals. Inspect beneath the vanity several times a year with a flashlight, looking for green corrosion, rust, mineral tracks, swollen panels, or damp stored items.
After any repair, check the cabinet again later that day and the following morning. Place dry paper beneath connections to reveal slow drips. Know where the fixture shutoffs and main shutoff are located before an emergency. Replacing visibly deteriorated supply hoses during planned maintenance is safer than waiting for them to fail, provided the valves and fittings can be operated without disturbing fragile piping.
Frequently asked questions
Why does my faucet still drip after I replace the cartridge?
The replacement may be incorrect, installed in the wrong orientation, or damaged by debris. A worn valve seat, scratched sealing surface, loose retaining nut, or excessive water pressure can also cause continued dripping. Shut the water off and compare the old and new parts carefully rather than tightening everything harder.
Can I leave a faucet dripping for a few weeks?
A slow drip may not be an immediate emergency, but it wastes water and can worsen. Leakage around the base or below the sink is more concerning because it can damage cabinets and flooring. Arrange repair promptly and close fixture shutoffs when the sink is unattended if they operate reliably.
Should I use plumber’s tape on faucet connections?
Only where the fitting design calls for thread seal tape. Many supply hoses seal with an internal rubber washer, and compression fittings seal at a ferrule. Tape on the wrong connection may interfere with proper seating. Follow the fixture and connector instructions.
Why does the faucet leak only when hot water runs?
The hot-side cartridge, washer, or connection may be failing, and thermal expansion can reveal a marginal seal. Test each supply independently and inspect below the sink. Hot water also creates a burn risk, so let components cool before disassembly.
Is a noisy faucet related to the leak?
It can be. A loose washer, obstructed aerator, failing cartridge, partially closed valve, or excessive pressure may cause chatter or whistling. Noise combined with pipe movement, pressure surges, or recurring failures warrants professional diagnosis rather than repeated part replacement.
A methodical inspection is the safest path from an irritating drip to a reliable repair. Control the water, identify the precise source, use exact replacement parts, and test more than once. When valves are unreliable or water has moved beyond the fixture, stopping early and calling a professional protects both the bathroom and the rest of the home.
Why This Is Different in San Antonio
Edwards Aquifer water around 357 mg/L (21 gpg) leaves scale inside aerators and cartridges. That can mimic a worn cartridge, obstruct a new one, or prevent a valve seat from sealing. SAWS water-quality information explains the mineral baseline, but the repair still depends on whether the drip comes from the spout, handle, base, or supply connection.
Alamo Heights homes may include galvanized risers or several generations of remodel plumbing. Protect the permanent piping: support the valve with a second wrench, do not force old stops, and flush debris before installing a new cartridge.
What San Antonio Homeowners Pay (2026)
| Faucet work | Typical homeowner range |
|---|---|
| DIY cartridge or seal kit | $20–$80 |
| Faucet repair/replacement labor | $150–$300 |
| New fixture, installed | $250–$700+ |
| After-hours leak visit | $250–$500 |
Fixture brand, seized valves, countertop access, and wall-side damage affect the quote. Confirm whether the faucet and supply tubes are included.
When to Call a San Antonio Plumber
Call if the stops do not close, the valve body is cracked, a wall connection moves, corrosion has thinned a tube, or water has entered the vanity, wall, or flooring. Close the house valve for uncontrolled flow. A licensed Bexar County plumber should inspect the supply connections before replacing the faucet if the source is uncertain.
San Antonio FAQ
Why does a new cartridge still drip?
Debris may remain in the valve body, the cartridge may be wrong or misaligned, or the seat may be damaged. Shut down and recheck rather than overtightening.
Can I soak faucet parts in vinegar?
Brief soaking can remove scale from a removable aerator, but follow the finish and manufacturer guidance. Do not pour acid into the assembled valve.
Does a slow drip need urgent service?
It is not the same as a burst line, but it wastes water and can worsen. A base or supply leak that wets the cabinet deserves faster action than a controlled spout drip.