> San Antonio Local Insight: Drain and sink clogs in San Antonio are different from other cities. Edwards Aquifer hard water (357 mg/L) deposits white calcium scale inside pipes that traps hair, grease, and soap more aggressively. Standard drain cleaners often fail because they dissolve organic matter but not mineral buildup. local homes need descaling-specific methods.
Trace the First Drop, Not the Puddle
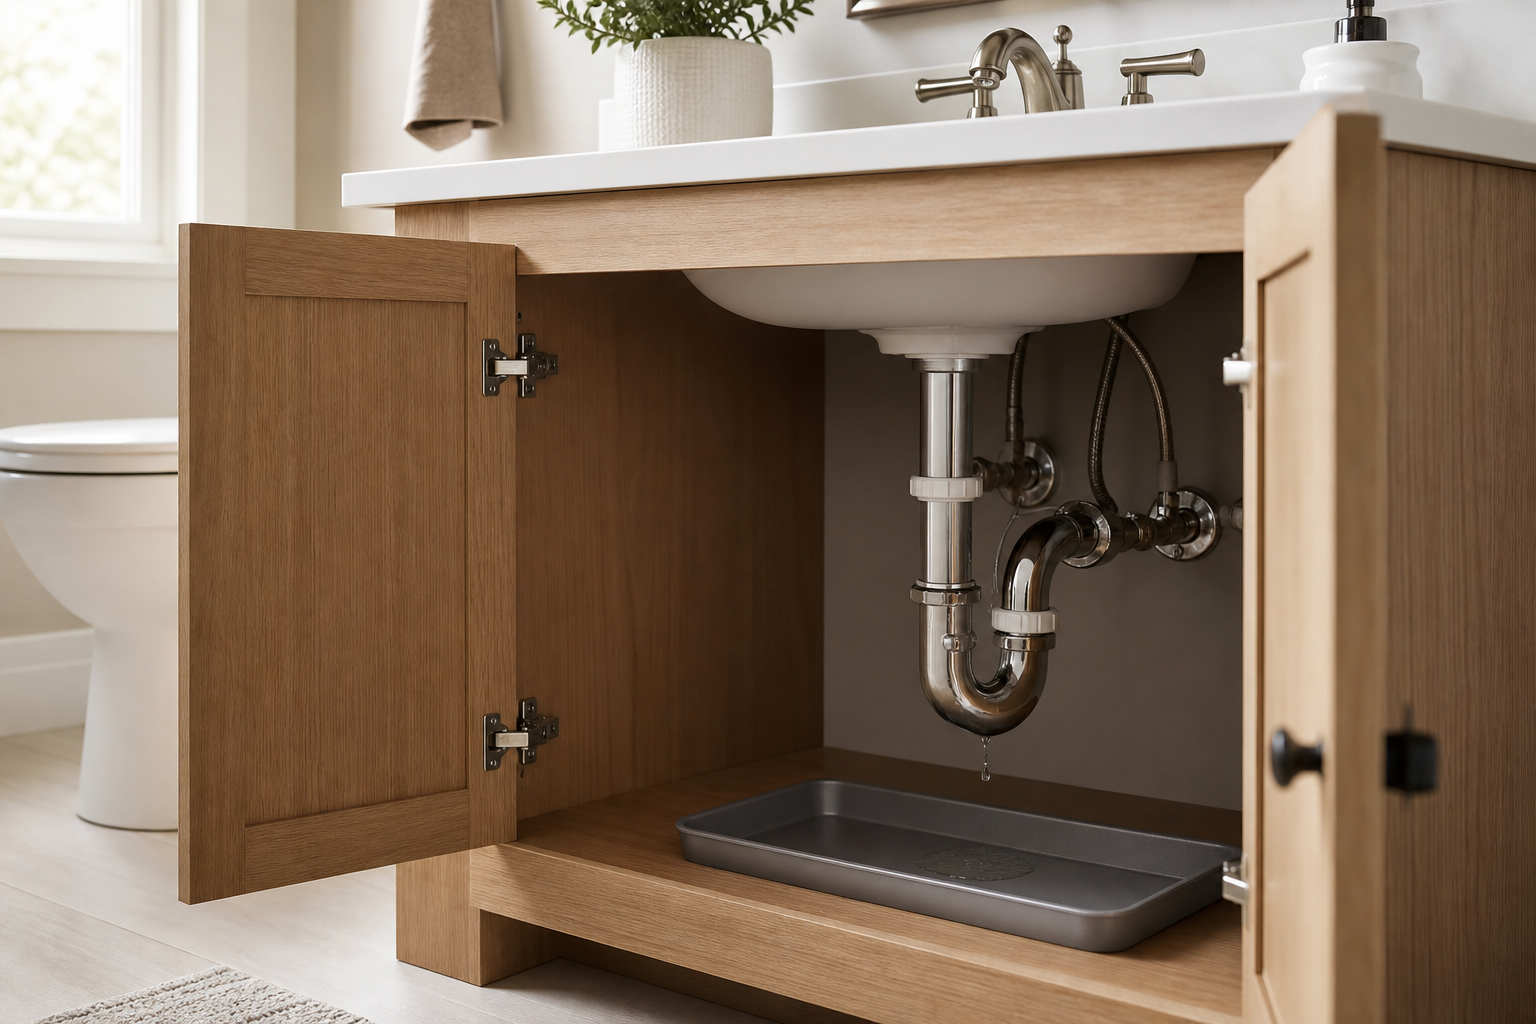
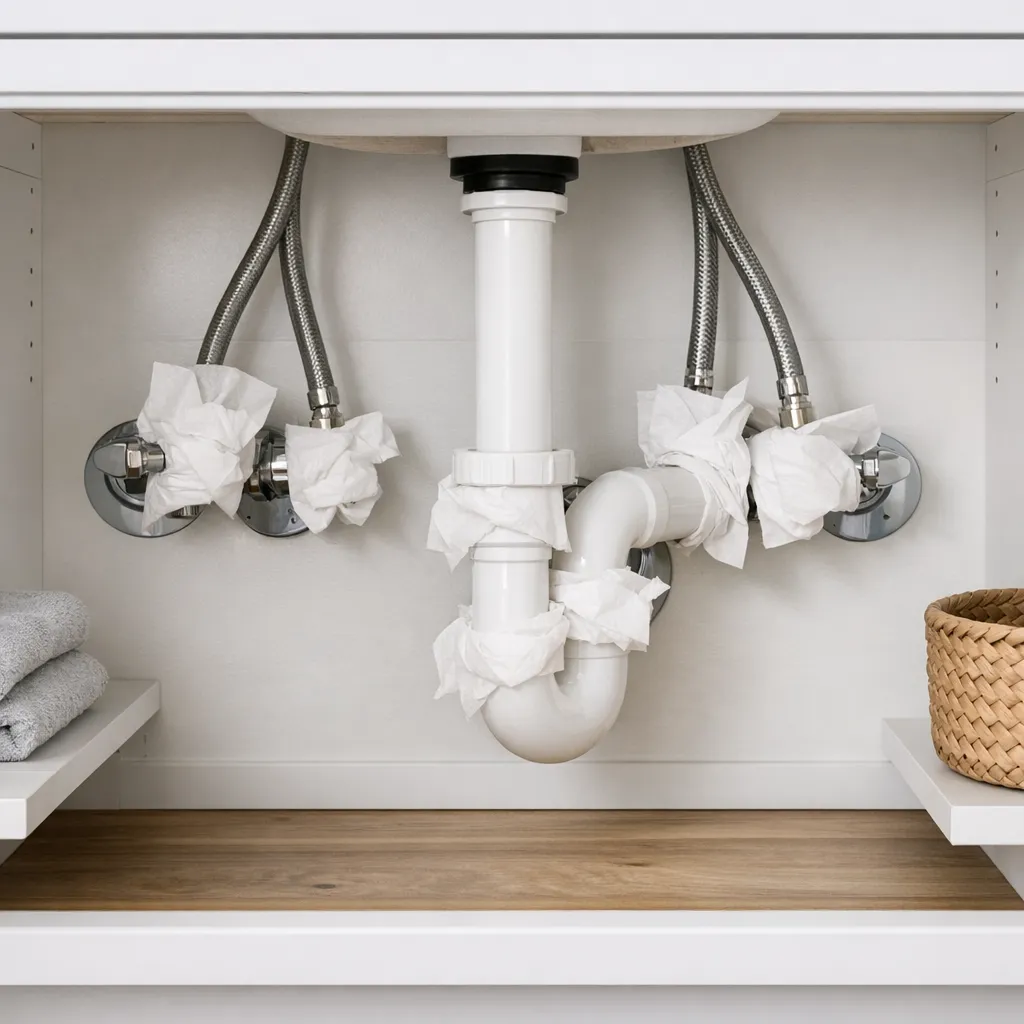
Empty the vanity, dry every fitting, and line the cabinet with paper towels. Then test the cold supply, hot supply, faucet base, a basin full of water, the drain flange, and the P-trap one at a time. Water follows tubing and cabinet edges, so the lowest wet fitting is not always the source.
Edwards Aquifer water at approximately 357 mg/L, or 21 gpg leaves white scale on stops, braided-supply nuts, drain flanges, and trap joints. In Stone Oak, many 1990s and 2000s homes have copper distribution with newer fixture connections; a pinhole leak or scaled stop should not be mistaken for a loose plastic trap nut. DIY washers and trap parts often cost $5–$40, while local fixture labor is commonly $150–$300.
Close the supplies before touching a pressurized fitting. If a stop valve is frozen, the wall is damp, or water appears even when the sink is unused, close the house shutoff and call a licensed Bexar County plumber. After Winter Storm Uri, concealed freeze damage remained a factor in some homes; repeated moisture deserves diagnosis, not another turn of the wrench.
Quick answer: trace the first drop, not the final puddle
Water travels along pipes and cabinet surfaces, so the wet spot at the bottom may be far from the source. Wrap dry tissue around each shutoff, supply-line connection, faucet shank, drain flange, tailpiece joint, and P-trap slip nut. Test cold water, hot water, a full basin drain, and a splash around the faucet deck separately. The first tissue to become wet identifies the relevant system.
Common causes include a loose or deteriorated supply hose, a leaking shutoff stem, failed faucet-base seals, a poorly sealed drain flange, loose slip-joint washers, or a cracked P-trap. Condensation is possible on cold pipes in humid rooms, but do not assume condensation until pressurized and drain leaks have been ruled out. If the cabinet cannot be kept dry, close functioning fixture shutoffs and arrange repair.
Use timing to identify the leaking system
The following quick-reference table helps separate likely sources:
| When the leak appears | Likely source | Best first test |
|---|---|---|
| Even when the sink is unused | Shutoff, supply hose, or pressurized faucet connection | Dry all parts and watch without running water |
| Only while cold or hot water runs | Matching supply line or faucet body | Test each handle separately |
| Only as the basin drains | Drain flange, tailpiece, stopper body, or P-trap | Fill basin, then release water |
| After water splashes on the deck | Faucet-base seal or failed caulk at backsplash | Pour a small controlled amount around the base |
| During humid weather on cold pipe | Condensation | Confirm uniform moisture rather than a single drip point |
Do not mix these tests together. If you run the faucet, fill the basin, splash the deck, and drain it at once, water can spread everywhere and defeat the diagnosis. Dry the cabinet between tests. Use a flashlight and inspect from the highest connection downward because gravity often carries water past several dry, functional joints before it falls.
Safety checks before touching plumbing
Know where the sink’s hot and cold shutoff valves are and where the home’s main valve is located. Turn fixture valves gently clockwise; never force a seized valve with a long wrench. If the valve body or pipe rotates, the stem begins leaking, or flow does not stop, discontinue DIY work. A compromised shutoff can turn a minor cabinet drip into uncontrolled water damage.
Bathroom cabinets may contain receptacles, lighting connections, or powered grooming devices. Unplug portable equipment from a dry location. If water has reached fixed wiring or an outlet, avoid the wet area and switch off the circuit only from a safely accessible, dry panel. Do not work around chemical drain cleaner: opening a trap containing caustic liquid can cause serious burns. Tell a plumber if cleaner has recently been used.
Soft cabinet panels, buckled flooring, dark staining, persistent musty odor, or visible mold suggest the leak has lasted longer than the current puddle indicates. Plumbing repair should be paired with drying and an assessment of damaged materials. Extensive contamination or moisture inside a wall may require qualified remediation rather than simply closing the cabinet door.
Inspect supply lines and shutoff valves
Supply plumbing is under pressure, so it may leak even when the faucet is off. Check where each braided hose joins the shutoff and faucet shank. A hose with rust, broken braid, a blister, a sharp kink, or moisture emerging through its body should be replaced, not patched. Place a towel and shallow pan below before testing, and keep the main shutoff accessible.
Many flexible hoses seal with captive rubber washers. Their straight threads are designed to draw the washer against a flat surface, not to be covered automatically with thread tape. If a connection seeps, shut off water, release faucet pressure, disconnect it, and inspect the washer and mating surface. Cross-threaded or corroded fittings need replacement. Overtightening can crush a washer or damage a faucet shank.
A shutoff that leaks around its stem may sometimes respond to a very small tightening of the packing nut, but old valves and fragile pipes deserve caution. Never brace against plumbing in a way that twists a pipe inside the wall. If corrosion is heavy or the valve will not isolate the sink, a plumber can replace it while controlling the main supply.
Check the faucet body and mounting area
Water can run through a faucet body or around its base and then follow mounting hardware into the cabinet. Dry the deck and cabinet, run one handle at a time, and look upward with a flashlight. A leak from a cartridge or internal hose may emerge at a faucet shank. On widespread faucets, the concealed hoses joining the spout and handles are additional possible sources.
Next, test the deck seal separately by keeping the faucet off and applying a small amount of water around the base. If moisture appears below, the base gasket, putty, or approved sealant may have failed. Repair can require disconnecting supplies, loosening mounting nuts, lifting the faucet, cleaning the surface, and reinstalling it according to its instructions. Natural stone and some plastics can be stained or damaged by unsuitable putty, so use only a compatible product.
An aerator that sprays backward can imitate a base leak by soaking the deck every time the faucet runs. Clean and reinstall the aerator before removing the entire fixture. Also inspect the countertop-to-backsplash joint; water from handwashing may enter there and collect beneath the sink without any failed plumbing component.
Test the drain flange and stopper assembly
If the cabinet stays dry while the faucet runs into a container but leaks when the basin empties, focus on the drain. Plug the sink, fill it partway, and inspect beneath the drain flange before releasing the stopper. Moisture around the upper tailpiece while the basin is holding water can indicate a failed flange seal or gasket.
Release the water and watch the stopper body, pivot-rod opening, threaded tailpiece, and joints below. A pop-up drain can leak at the pivot-rod seal if its retaining nut or gasket is misaligned. Tightening should be modest because plastic components crack and thin metal parts deform. A drain flange repair usually involves removing the drain body, cleaning old sealant, installing the correct gaskets and sealant, and aligning the assembly without excess force.
Inspect and reseat the P-trap
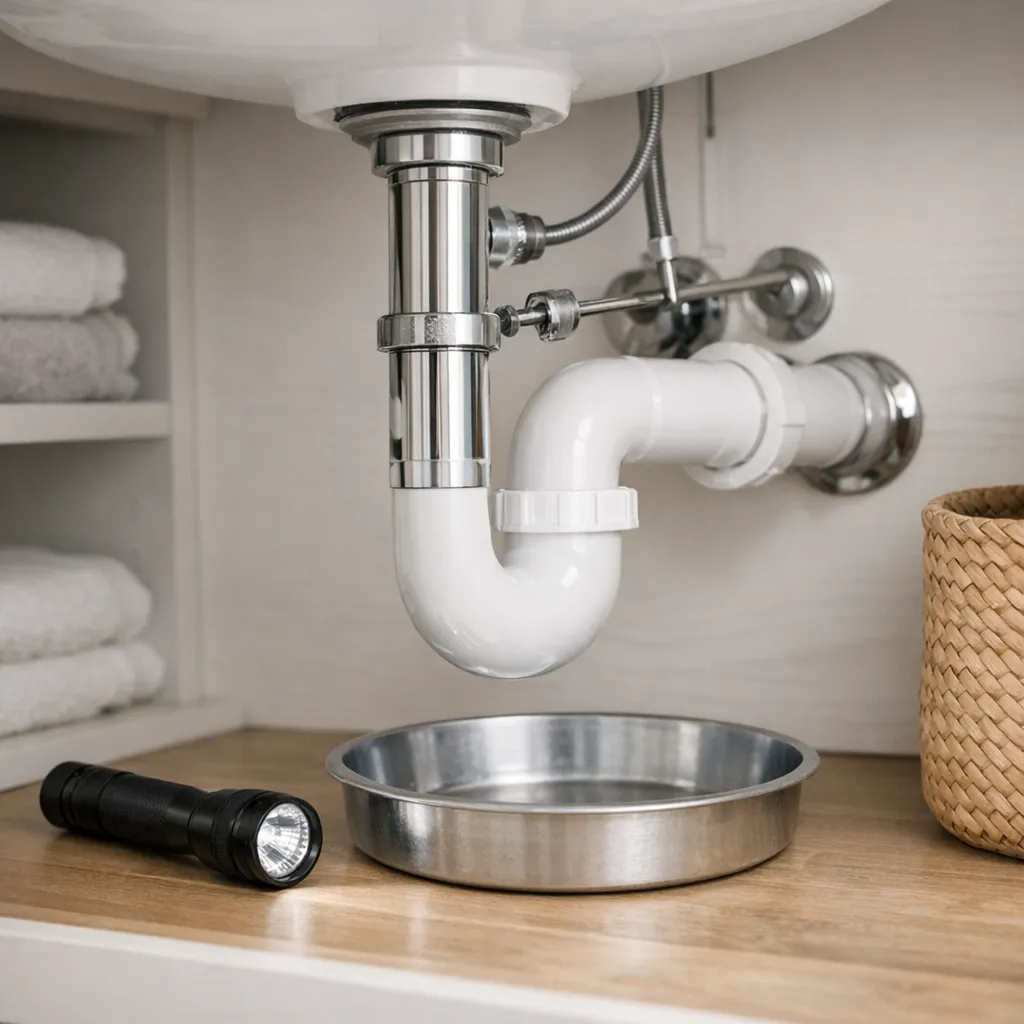
The curved P-trap holds water to block sewer gases. Slip-joint connections usually seal with beveled washers compressed by hand-tightened nuts. A washer installed backward, a pipe inserted at an angle, or poor alignment can create a drip whenever the basin drains. Place a pan below, avoid the area if drain cleaner was used, and loosen the joints carefully. The trap contains dirty water even when the basin is empty.
Inspect plastic parts for hairline cracks and metal parts for corrosion. Clean mating surfaces, orient each beveled washer correctly, align pipes without strain, and tighten nuts by hand before adding only a slight tool adjustment if needed. The trap arm must enter the wall fitting properly; forcing misaligned pieces together creates persistent leaks. Replace cracked or distorted components rather than covering them with tape or sealant.
After reassembly, run a small amount of water, then fill and drain the basin for a higher-volume test. Wipe every joint dry and repeat. If sewer odor persists, the trap will not retain water, or plumbing inside the wall leaks, stop and call a plumber. Do not open wall piping casually because drainage and venting defects require broader diagnosis.
A disciplined step-by-step repair process
Begin with documentation. Photograph the original arrangement, including washer orientation and pipe alignment. Put a pan under the work area, plug the sink drain if handling small hardware, and keep replacement parts nearby. Shut off the relevant water for any pressurized connection and open the faucet to relieve pressure. Drain repairs do not normally require shutting off the house supply, but household members should know not to use the sink while it is dismantled.
Replace one suspected component at a time when practical. This preserves your ability to confirm the cause. Match supply hoses by fitting type, length, and application; match drain washers by size and profile. Reassemble without cross-threading. Connections should start smoothly by hand. If a nut binds immediately, back it off and realign rather than forcing it with pliers.
Test in stages: low flow, normal hot and cold flow, a basin-holding test, and a full drain. Then dry the cabinet and place clean paper beneath the plumbing. Recheck after an hour and the next morning. Very slow seepage can evade a five-minute inspection, especially at a faucet shank or the back of a trap joint.
Common fixes to avoid
Do not apply caulk over a wet joint, wrap tape around the outside of a leaking hose, or coat slip-joint washers with random adhesive. These treatments hide the source and complicate proper repair. Thread tape is useful only on fittings designed to seal at tapered threads. Supply connectors with rubber washers and drain slip joints use different sealing methods.
Avoid tightening every nut as hard as possible. Excess force cracks plastic traps, crushes washers, strips faucet shanks, and distorts drain bodies. Do not reuse hardened, split, or flattened washers simply because they fit back into place. And never treat chemical drain cleaner as a leak solution; it does not seal plumbing and creates exposure risk when a joint is opened.
When repair becomes replacement—or a professional job
A single loose slip joint or worn hose is often a manageable repair when shutoffs function and access is good. Replacement is more sensible when a hose is deteriorated, a trap is cracked, a drain body is corroded, or several faucet components are failing. Choose code-appropriate plumbing parts intended for potable supply or drainage as applicable, not improvised tubing or general-purpose hardware.
Call a licensed plumber for nonworking shutoffs, uncontrolled leakage, moving pipes, severe corrosion, inaccessible wall connections, recurring failures, or evidence that water has entered the wall or floor. Also seek help if the vanity must be removed, a stone counter makes faucet access risky, or drain alignment cannot be achieved without forcing pipes. Water near electrical equipment requires the appropriate electrical safety response as well.
Costs vary greatly with access, region, fixture type, and hidden damage. A washer or trap component is usually a small material purchase, while shutoff replacement, faucet removal, cabinetry repair, or concealed-pipe work adds labor and scope. Get a written description of the proposed repair when the source is not obvious.
Preventing leaks beneath a bathroom sink
Inspect the cabinet every few months instead of waiting for a puddle. Look for mineral deposits, green or white corrosion, rust, darkened wood, swollen panels, and damp stored products. Keep the area organized so plumbing remains visible and bottles do not press against the P-trap or valves. Operate shutoffs periodically only if they are in sound condition; fragile, corroded valves should be assessed rather than exercised forcefully.
Clean the stopper and drain mechanically before severe buildup encourages aggressive chemical treatment. Avoid hanging items from pipes. Replace visibly deteriorated flexible connectors during planned maintenance, and check all work after anyone has moved plumbing or installed a vanity accessory. A simple dry-paper inspection can reveal a seep long before it damages the cabinet.
Frequently asked questions
Why is it wet under the sink even when no one uses it?
A pressurized supply hose, shutoff valve, or faucet connection may be leaking continuously. Dry everything, wrap tissues around those points, and observe without running water. Condensation is possible, but a localized first wet point usually indicates leakage.
Can I use thread tape to stop a P-trap leak?
Usually no. P-trap slip joints seal with beveled washers, not at the threads. Correct washer orientation, clean surfaces, and proper alignment matter more than tape. Replace a damaged washer or cracked pipe.
Why does the leak happen only when the sink is full?
A full basin places water against the drain flange and sends a large volume through the drain when released. That can reveal a failed flange seal, stopper-body leak, loose slip joint, restriction, or crack that low flow does not expose.
Is water beneath the faucet always a supply-line leak?
No. Water may travel down from a failed faucet cartridge, internal hose, mounting gasket, deck seal, or backsplash joint. Use separate running-water and controlled splash tests to locate the first drop.
How long should I monitor a repair?
Test immediately under several operating conditions, then inspect later the same day and the following morning. Leave dry paper beneath each connection so slow seepage is visible. Continue occasional checks during the next week.
A bathroom sink leak is easiest to solve when you separate the pressurized supply, faucet, deck, and drain into distinct tests. Trace water upward to its first appearance, use the sealing method intended for that fitting, and retest after the cabinet is dry. If shutoffs cannot control the water or damage extends beyond accessible plumbing, professional help is the safer and often less expensive boundary.
Why This Is Different in San Antonio
Edwards Aquifer water near 357 mg/L (21 gpg) can crust supply stops, abrade faucet seals, and collect around drain joints. SAWS water reports explain the source, but timing tests reveal the repair: constant moisture suggests a pressurized supply; water only during draining suggests the flange, tailpiece, or trap.
Stone Oak homes often mix copper distribution with replaceable braided connectors and plastic tubular drains. Each material needs the right touch. Hand-tighten slip joints before a small additional turn, support metal valves with a second wrench, and never hide an active leak with tape or sealant.
What San Antonio Homeowners Pay (2026)
| Under-sink repair | Typical homeowner range |
|---|---|
| Washers, trap, or connector parts | $5–$80 |
| Supply/drain repair labor | $150–$300 |
| Cabinet drying or repair | $200–$1,000+ |
| After-hours leak visit | $250–$500 |
The source, access, cabinet damage, and need for a new shutoff determine the final price. Ask the plumber to show the first failing joint before authorizing adjacent work.
When to Call a San Antonio Plumber
Call for a frozen shutoff, a corroded or bulging supply tube, moisture from the wall, repeated trap separation, sewage odor, or cabinet/floor damage. Shut off the house water if flow cannot be controlled. A licensed Bexar County plumber should pressure-test supply repairs and drain-test the basin before leaving.
San Antonio FAQ
Why does water appear when the sink is not used?
Suspect a pressurized supply, faucet connection, condensate, or water traveling from another fixture. Close the sink stops and observe; close the house valve if flow continues.
Can I seal a trap leak with tape?
No. Slip-joint traps seal with aligned washers, not thread tape. Replace a distorted washer or damaged tube.
How long should I test a repair?
Run hot and cold water, fill and release the basin several times, then leave dry paper beneath every joint and recheck later that day.
For a San Antonio homeowner, a documented diagnosis is safer than guessing.