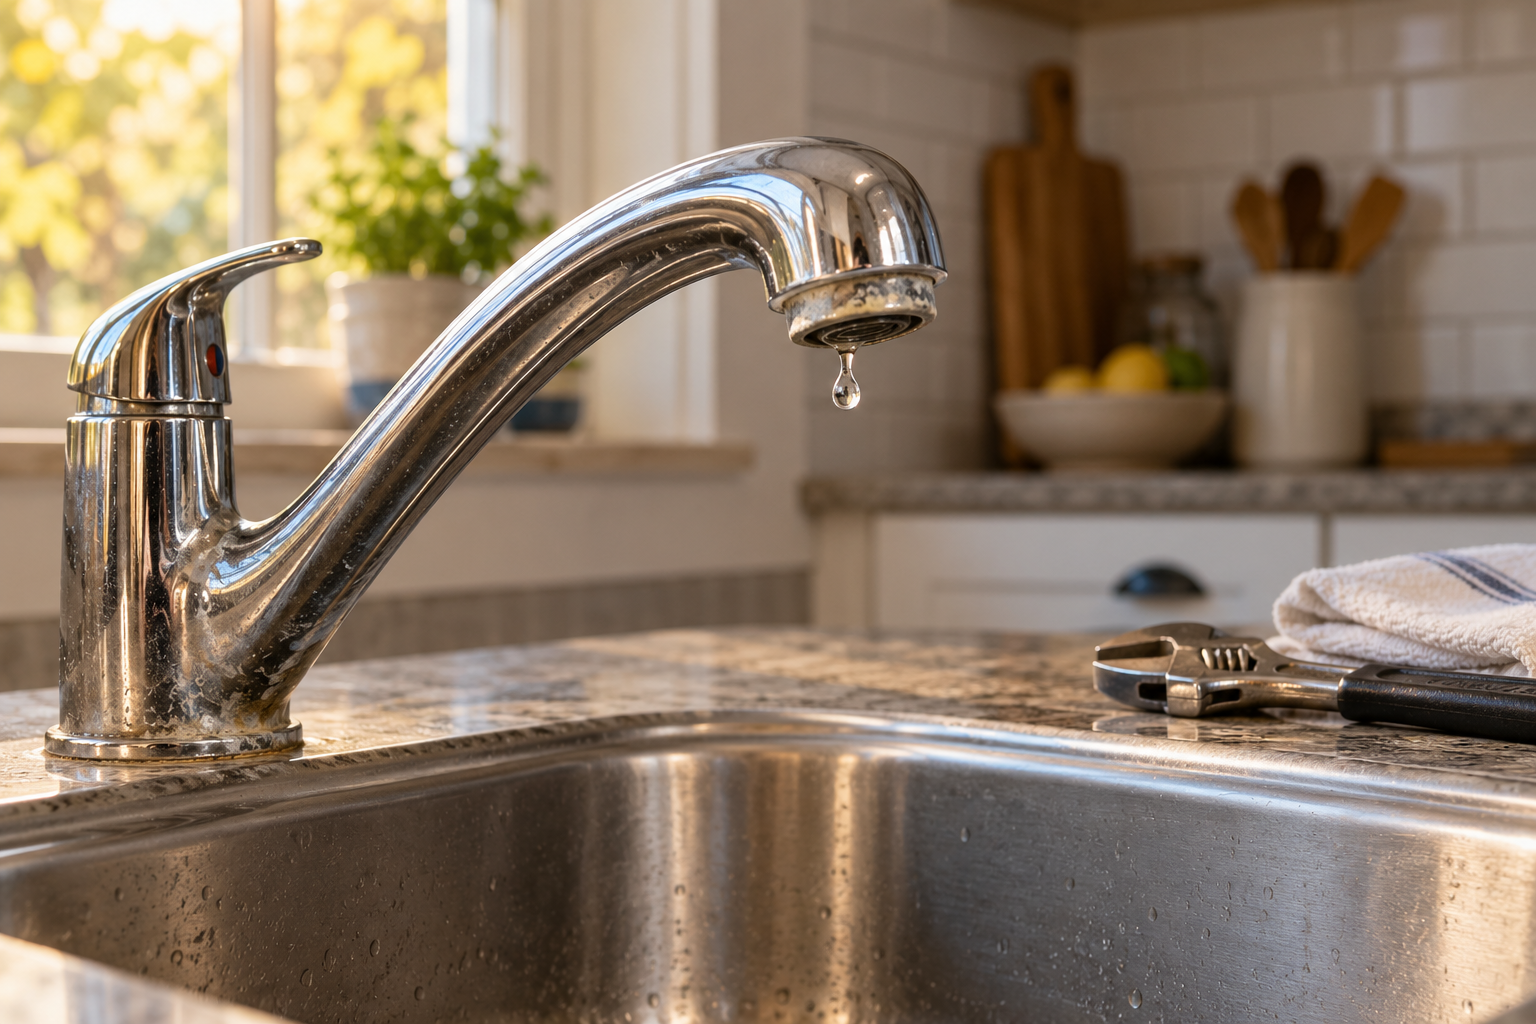
> San Antonio Local Insight: Fixture and faucet leaks in San Antonio happen faster because hard water minerals (21 gpg from Edwards Aquifer) grind down valve seats, corrode cartridges, and prevent proper sealing. A faucet that lasts 15 years in soft-water cities often starts leaking within 5–8 years in San Antonio without a water softener.
Local San Antonio Field Notes Before You Start
In Westover Hills and Alamo Ranch, a newer-looking faucet can still leak early because the working surfaces see Edwards Aquifer hardness of about 357 mg/L (21 gpg). Scale around the aerator is visible evidence; inside, the same deposits can keep a cartridge from seating. Remove and clean the aerator first, but do not soak plated trim in strong acid or scrape a ceramic valve seat with metal.
Use the leak pattern to set the budget. An aerator or O-ring may cost $5–$25, a brand-name cartridge commonly runs $25–$100, and a normal plumber visit is often $175–$400. Water under the cabinet, a swollen vanity panel, or a corroded shutoff turns this from a nuisance drip into damage control. Shut the supply, dry the cabinet, and document the loss before testing parts.
If all fixtures are off and the SAWS meter still advances, the tap is not the whole story. That check is especially valuable after a Bexar County freeze or a summer irrigation change, when unrelated service-line or exterior leaks can appear at the same time. Treat the meter as evidence, not as permission to dismantle concealed plumbing.
First, Confirm That the Tap Is Actually Leaking
Dry the entire fixture and surrounding area with a towel. Include the spout, handles, tap base, sink rim, supply hoses, shutoff valves, drain fittings, and cabinet floor. Place dry tissue against each joint because even a tiny seep will darken it. Observe the tap when closed, while running, and shortly after use. Condensation on a cold line and splashed water around a basin are commonly mistaken for plumbing leaks.
Note both the location and timing. A drip from the spout while the tap is off points toward an internal valve seal. Water that appears around a handle only while it is open often implicates a stem seal. Moisture at the base may be a failed body gasket or water passing beneath loose trim. If the cabinet becomes wet only while the basin drains, investigate the waste fittings instead. Moisture continuing regardless of tap use may require a broader pipe leak repair assessment.
Match the Symptom to the Most Likely Cause
Compression taps use a threaded stem to press a rubber washer against a valve seat. Over time, the washer can harden, split, loosen, or wear unevenly. A pitted seat may damage a new washer quickly. Ceramic-disc and many mixer taps use replaceable cartridges. Their seals can deteriorate, while mineral particles can obstruct the precision surfaces that stop flow. A quarter-turn action often indicates ceramic components, but appearance alone is not definitive.
Leaks at moving parts have different causes. A worn O-ring can let water rise around the spindle; a loose retaining nut can contribute, although indiscriminate tightening may cause damage. At the tap base, a failed gasket, deteriorated sealant, loose mount, or cracked body may be responsible. Underneath, aged flexible hoses, flattened washers, corroded shutoff valves, and stressed connections deserve close attention. A hose showing bulges, broken braid, or severe corrosion should not be treated as a minor drip.
| Where water appears | Common cause | Safe next step |
|---|---|---|
| Spout, with handles off | Washer, valve seat, or cartridge | Identify the tap and obtain its exact wear part |
| Around a handle | Stem O-ring, packing, or cartridge seal | Isolate water and inspect model-specific seals |
| Around the tap base | Body gasket, mounting seal, or splash | Dry and retest before dismantling |
| At a supply connection | Washer, hose, valve, or loose fitting | Shut off water; inspect for damage |
| Inside a wall or floor | Concealed plumbing failure | Stop use and call a plumber |
Make the Area Safe Before Starting
Turn the fixture’s isolation valves gently clockwise, then open the tap to verify that both hot and cold flow have stopped. A valve that feels seized should not be forced. If isolation valves are absent or ineffective, close the main water supply and confirm the result before opening the tap. Let other household members know what you are doing so no one unexpectedly restores the supply during disassembly.
Keep water away from outlets, disposals, appliance connections, and other electrical equipment. If leakage has already reached wiring or an energized device, do not stand in water or touch wet electrical components. Have the electrical hazard made safe by a qualified person. A tap leak does not normally create a gas or sewage hazard, but a gas odor or wastewater backup indicates a separate emergency: stop work, avoid ignition sources where applicable, leave the area if necessary, and contact the appropriate utility or licensed professional.
Plug the drain, protect the basin with a folded towel, and put a tray beneath the pipework. Photograph every stage and arrange removed parts in order. This preparation prevents lost screws and helps you reinstall orientation-sensitive components correctly.
Identify the Tap and Buy the Correct Part
Look for a maker’s mark and model information on the body, underside, original paperwork, or manufacturer website. Remove no internal parts until the water is securely isolated. Once accessible, compare the old washer or cartridge by dimensions, stem profile, locating tabs, ports, and fastener style—not simply by color. Proprietary cartridges that look almost identical may be incompatible.
If the model remains uncertain, take the original component and photos to a plumbing supplier. Do not grind, trim, stack, or force a mismatched cartridge. The wrong part can obstruct flow, leak immediately, or crack the tap body. For standard compression designs, the replacement washer must still match diameter, thickness, and screw arrangement. Keep the original until the repair has passed a full leak test.

Use the Right Tools Without Damaging the Finish
A typical repair may need flat and Phillips screwdrivers, hex keys, an adjustable wrench, needle-nose pliers, a soft brush, cloths, and a small flashlight. Smooth-jaw tools or a protective cloth reduce scratching on chrome. A faucet repair tool kit is useful only if it suits the fixture; buying excessive tools does not compensate for an unidentified cartridge.
Use silicone plumber’s grease only where the component maker permits it. Petroleum products can degrade some elastomers. Thread-sealing tape is appropriate on certain tapered threaded pipe joints, but not on compression seals, cartridge bodies, valve seats, or every nut that happens to leak. This distinction matters when asking does plumbing tape stop leaks: tape cannot restore a worn washer and may interfere with a joint designed to seal on a gasket.
Avoid toothed pliers directly on finished surfaces. Do not use a torch, drill, grinder, or aggressive chemical inside a tap body. Those methods can damage precision surfaces and create contamination or fire risk. A seized or heavily corroded assembly is a sensible stopping point for DIY work.
Replace a Compression Washer Carefully
After isolation, remove the decorative cap if present, loosen the handle screw, and lift the handle straight off. Unscrew trim and the valve retaining assembly with controlled pressure while supporting the tap body. Remove the stem and examine the washer at its lower end. Cracking, flattening, distortion, or a loose retaining screw may explain a spout drip. Replace it with an exact match.
Inspect the valve seat with a flashlight. A smooth seat can accept the new washer; obvious grooves, cracks, or extensive corrosion require professional attention or model-approved service. Scraping or cutting a seat without the proper knowledge can make it uneven. Clean only loose debris with a soft cloth or brush. Reinstall the stem in its original orientation and tighten it enough to seal without forcing threads.
Restore water slowly and test. A compression handle should close with normal hand pressure. If stopping the drip requires excessive force, the underlying defect remains. Repeatedly crushing the washer shortens its life and can damage the stem.
Replace a Cartridge Without Guesswork
Remove the handle and trim, then photograph the cartridge’s orientation and any hot/cold markings. Carefully release the retaining nut or clip. Pull the cartridge straight out with a model-appropriate tool if required; sideways leverage can damage the housing. Clean accessible loose scale without scratching the cartridge bore or pushing debris into open waterways.
Lightly lubricate new seals only when instructed, align all tabs and ports, and seat the exact replacement evenly. Refit the clip or retainer snugly. Excess torque can deform O-rings or crack plastic and ceramic components. Reinstall the handle, open the tap, and restore the supply slowly to purge air. Then close it and inspect the spout, handle, base, and underside with dry tissue.

Test hot and cold operation through the full handle range. Recheck after several minutes and again later, because a small seep can take time to appear. If the handle moves incorrectly or temperature control is reversed, shut the water off and verify cartridge orientation rather than forcing it.
Deal With Leaks at the Base or Under the Sink
Water at the base should be diagnosed before resealing. Run the tap carefully without splashing and watch whether moisture emerges from within the body. If the body itself leaks, a gasket, O-ring, swivel-spout seal, or crack may be involved. If water enters only after the countertop gets wet, failed perimeter sealant or a loose mounting assembly is more likely. Sealant should not be used to conceal an active internal leak.
Below the sink, support the tap and hoses while checking connections. A loose fitting may need a modest adjustment, but overtightening can split a nut, distort a washer, or damage a valve. Replace visibly deteriorated hoses rather than trying to patch them. If turning one fitting twists fixed pipework or a shutoff valve begins leaking at its stem, stop and call a plumber. An inaccessible bathtub faucet leaking deserves particular caution because water can escape behind finishes unnoticed.
After any under-sink work, line the dry cabinet with paper and operate the fixture repeatedly. Inspect every joint with a flashlight. Remove the paper only after it remains completely dry; leaving absorbent material permanently can hide future leaks.
Recognize When a Plumber Is the Better Choice
Call a licensed plumber when you cannot completely shut off the water, the tap or pipe body is cracked, fittings are severely corroded, or a leak returns despite an exact replacement part. Other red flags include damaged valve seats, unusually high pressure, water hammer, moving fixed pipes, repeated cartridge failures, and obsolete components that require modifying the installation.
Active spray, a swelling cabinet, lifted flooring, damp drywall, or staining on a ceiling below requires prompt attention. Hidden water can travel along framing and appear far from its source. Professional diagnosis is usually cheaper than opening and repairing finishes after prolonged leakage. Code-level changes to fixed supply lines should also be left to an appropriately licensed trade.
Do not continue a routine repair if water is near live electrical equipment. Likewise, sewage backup and gas odor are not solved by replacing a tap seal. Treat each hazard according to its own emergency procedure and use qualified help.
Understand Time, Cost, and Repair Tradeoffs
A simple, accessible washer replacement can be inexpensive and may take a careful homeowner part of an afternoon, including diagnosis and testing. A proprietary cartridge costs more and can take days to source even though installation is brief. Location, fixture age, corrosion, access, and failed shutoff valves have more effect on the overall job than the visible drip rate.
Plumber charges vary significantly by region, callout time, and scope, so a single universal price would be misleading. Ask whether diagnosis, parts, testing, and replacement of related connectors are included. If a tap is badly corroded, structurally cracked, or unsupported by its manufacturer, compare complete replacement with repairing one component. Replacement may offer better value, but awkward mounting and old hoses can make professional installation worthwhile.
Factor in the potential cost of water damage. Paying for help is especially rational when a DIY mistake could release water into a finished wall or room below. For an open, modern basin tap with working isolation valves, a matched part and patient approach make DIY more defensible.
Prevent Leaks and Catch Them Earlier
Close handles with normal hand pressure rather than wrenching them tight. Excess force deforms compression washers and stresses stems. Keep the cabinet beneath a sink organized enough to inspect, and periodically use a flashlight to check valves, hoses, and the cabinet floor. Follow hose manufacturers’ replacement guidance and act immediately on corrosion, kinks, damaged braid, or swelling.
Clean removable aerators according to the fixture instructions. Mineral scale and debris can reduce flow and contribute to cartridge problems, but avoid scratching internal sealing surfaces. After water-service work, flush lines as recommended so loosened debris does not lodge in a cartridge. Persistent pressure problems or simultaneous drips at several fixtures warrant a system assessment.
Know the location of the main shutoff and keep access clear. Label it so another occupant can respond during an emergency. A working shutoff and early observation turn many leaks into contained repairs rather than damage claims.
Frequently Asked Questions
What causes a leaking tap most often?
The usual causes are a worn compression washer, deteriorated O-ring, failed ceramic cartridge, debris on a sealing surface, or damage to the valve seat. The leak location and tap type narrow the diagnosis.
Can I fix it myself?
You can often replace an accessible, clearly identified washer, O-ring, or cartridge if the water isolates fully and the surrounding plumbing is sound. Stop if parts seize, fixed pipes move, or you cannot obtain an exact replacement.
How urgent is a dripping spout?
A slow drip into a functioning basin is usually not an emergency, but it wastes water and should be repaired. Water beneath the sink, inside a wall, near electricity, or through a ceiling is urgent even if the visible flow is small.
What should I avoid doing?
Do not overtighten handles, force shutoff valves, use glue as a plumbing seal, add tape to unsuitable joints, or dismantle the tap before verifying that the water is off. Never ignore a damaged supply hose.
Why does a new part still leak?
It may be the wrong model, incorrectly oriented, damaged, or obstructed by debris. The mating seat or tap body may also be worn. Shut off the supply and recheck the installation; use a plumber if the exact part repeatedly fails.
Why This Is Different in San Antonio
San Antonio's Edwards Aquifer supplies some of the hardest municipal water in the United States: about 357 mg/L, or 21 grains per gallon. That limestone-filtered groundwater carries calcium carbonate and magnesium into our fixtures, valves, drains, heaters, and supply lines. For leaking tap, that matters because mineral deposits grind down seals, cartridges, fill valves, supply stops, spray arms, and small water passages faster than many generic guides assume.
- Scale buildup makes small restrictions worse, especially at cartridges, aerators, shutoff valves, drains, and heater connections.
- Fixtures, pipes, and appliances in our area can wear out 30-50% faster than in soft-water cities when maintenance is delayed.
- SAWS publishes annual water quality reports, but the practical homeowner takeaway is simple: maintenance intervals here should be shorter than national advice suggests.
Homes in Westover Hills and Alamo Ranch are particularly affected because newer PEX-heavy construction still sees fixture wear from 21 gpg hard water. Unlike cities with naturally soft water, local homeowners should treat hard-water maintenance as normal prevention, not an upsell.
> "When I see early leaks in San Antonio, I always look for hard-water scale, corrosion, and older neighborhood pipe materials before blaming one bad fixture." — Licensed local plumber
What San Antonio Homeowners Pay (2026)
| Service | Typical Cost in San Antonio |
|---|---|
| Emergency plumber call | $150–$350; after hours $250–$500 |
| Faucet replacement labor | $150–$300 |
| Plumber hourly rate | $85–$150/hr |
Prices are based on local metro area ranges for 2026. Costs may vary by neighborhood, access, pipe material, after-hours timing, and whether the plumber finds hard-water damage beyond the visible problem.
When to Call a San Antonio Plumber
Call a licensed local plumber if the problem involves active leaking, a shutoff valve that will not close, sewer smell, recurring clogs, water near electrical components, a water heater leak, or any pipe inside a wall, ceiling, or slab. Locally, expect many licensed plumbers to charge roughly $85-$150 per hour, with emergency visits commonly around $150-$350 and after-hours calls closer to $250-$500.
When you call, ask three local questions:
1. Are you licensed and insured for work in Bexar County or the surrounding local metro?
2. Have you dealt with Edwards Aquifer hard-water scale on this type of repair?
3. Should I also check the water heater, shutoff valves, or water softener while you are there?
local plumbers see hard-water issues every week, so a good pro should be able to explain whether the failure is normal wear, mineral damage, freeze damage from a cold snap like Winter Storm Uri, or a sign of a larger plumbing system problem.
San Antonio FAQ
Is local water hard?
Yes. San Antonio water is very hard at about 357 mg/L, or 21 grains per gallon, because much of it comes from the Edwards Aquifer and passes through limestone. That mineral content is why scale shows up quickly on faucets, showerheads, valves, drains, and water heaters.
Do local homes need a water softener?
A water softener is recommended for many local homes, especially if you see white scale, repeated faucet or valve problems, short water-heater life, or cloudy spots on dishes. A typical whole-home water softener installation in San Antonio runs about $1,500-$4,000.